Hello friends!
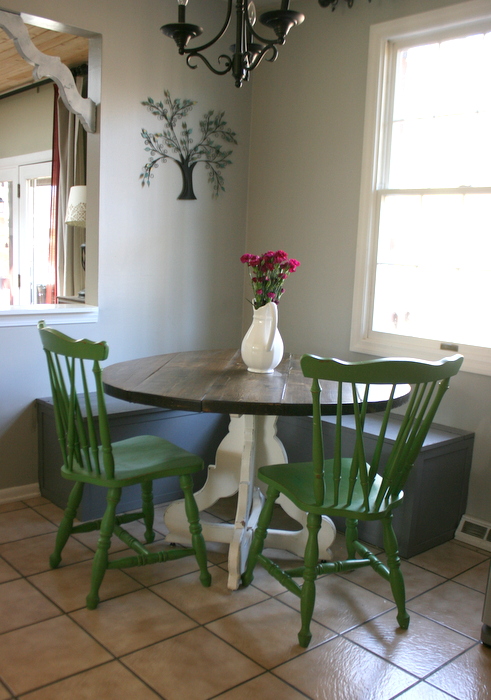
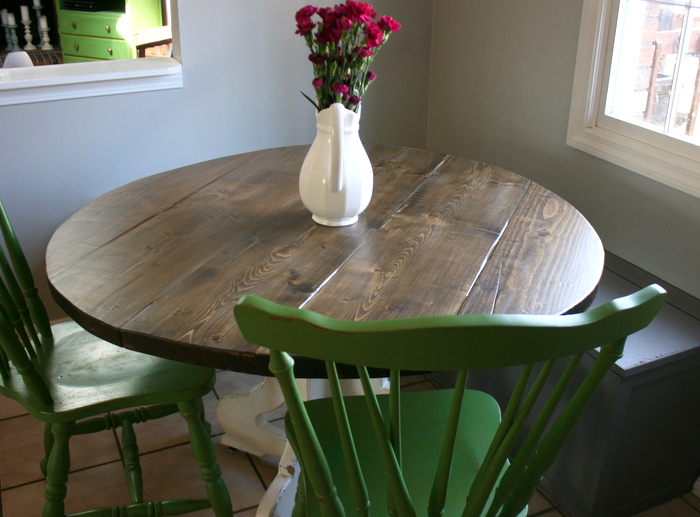
The kitchen project marches on, and today’s post is all about how I made my new kitchen table top. I switched from a square to round top, and with the built in seating the table is able to be pushed out of the walkway of the room. It gives it a bigger appearance while still giving us the seating we need.
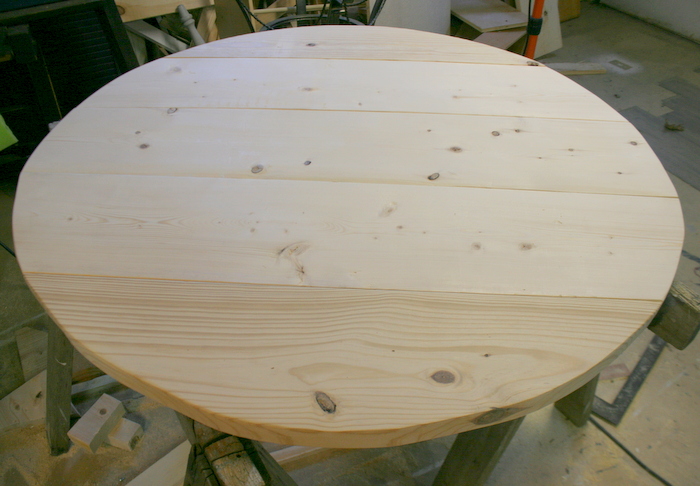
I really wanted a planked table top, but it’s hard to find round tops that are the right size (this is a 44″ diameter), so I decided to build my own!
This post contains affiliate links of some of the products I used for this project. Links are there to help you find the things I’m talking about and if you use them I get paid a small commission with no extra charge to you.
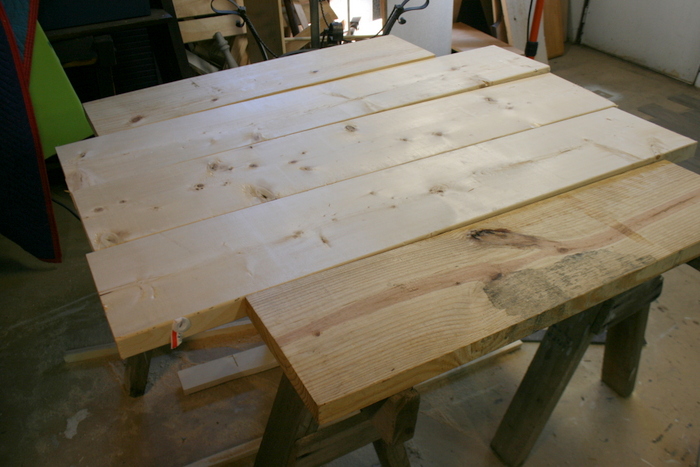
To start off I bought 2×12’s from the lumber store and cut them down to approximate size.
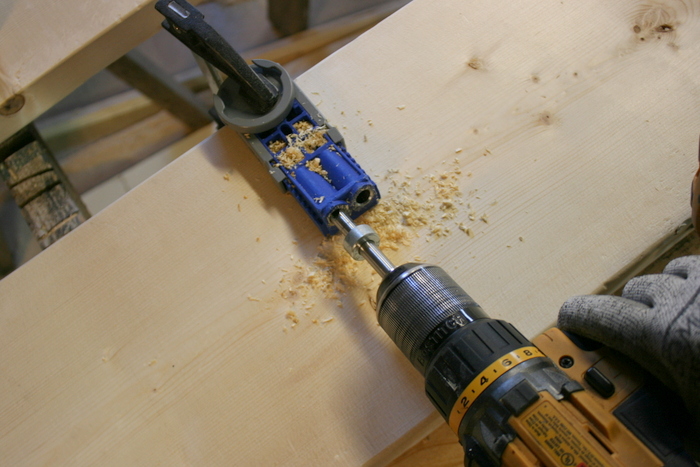
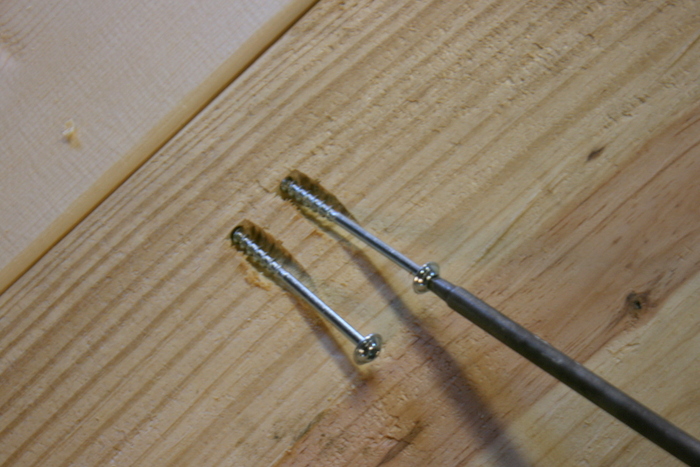
Once I had my boards laid out, I glued and screwed them. A quick line of wood glue on each edge and a couple of pocket holes with my Kreg Jig.
I was a little nervous to use this little tool for a while, but it’s really quite simple, using a few settings on the jig you adjust for the thickness of the board you are using and it positions the jig so you drill diagonally into the wood at just the right depth.
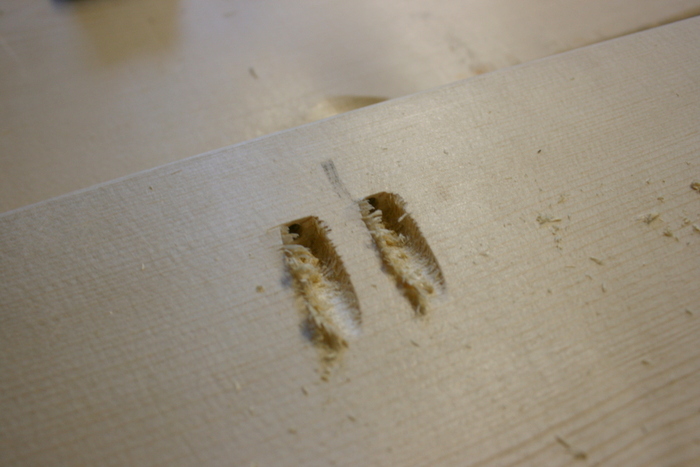
Here’s what you’re left with.
Then you screw right through one board an into the next making a nice tight (strong) fit.
Now to make a circle. I took half of the diameter of the table size (so 22″ for my 44″ table), put a pin in the center of the table and tied a string to it that was the length of half the diameter (22″ in this case). Using a marker I kept the string tight and made a circle around the table. Now I had my line to cut!
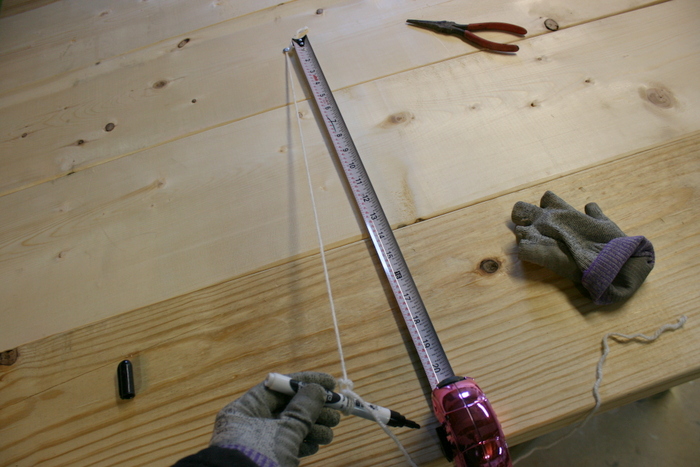
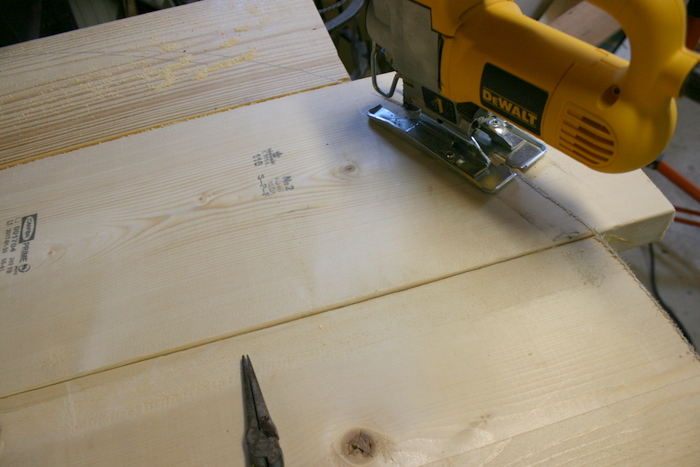
I used my jigsaw to cut my circle which worked just perfectly.
Ta-da!
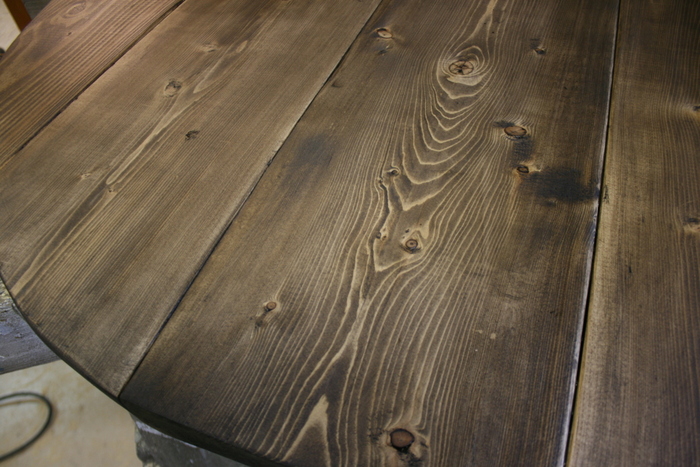
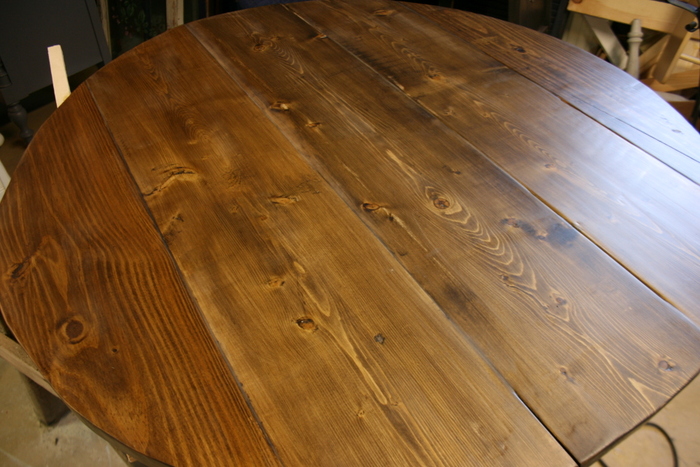
From here I sanded and stained the top (using a mix of GF Antique Oak and Walnut Water based Stain).
Once my stain was dry, I was ready for epoxy resin. Here’s what I was trying to do with this… the previous plank table got pretty nasty with crumbs and food. As much as I tried to clean it, it was just a little gross. I really wanted the planks and knots to be sealed – leaving the character of the wood without the germs. Hence the epoxy.
I tried it while doing a Facebook LIVE, and I was getting a little flustered as it was quickly going awry…
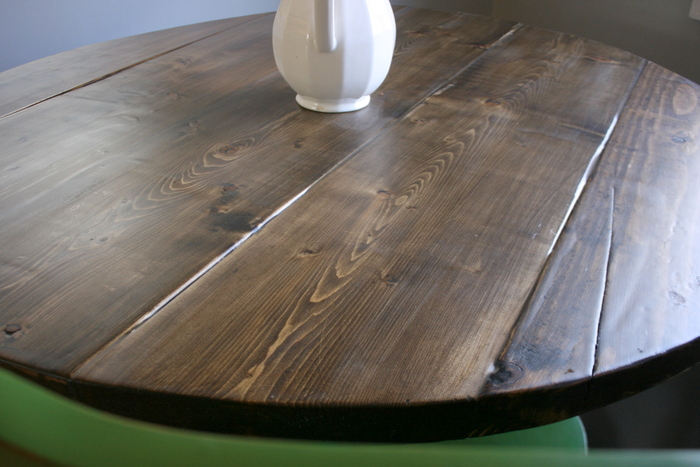
Here’s the result. It’s super shiny, and a little un-even. Rather than scrap it (there’s a lot of work in this so far) I decided to go with it.
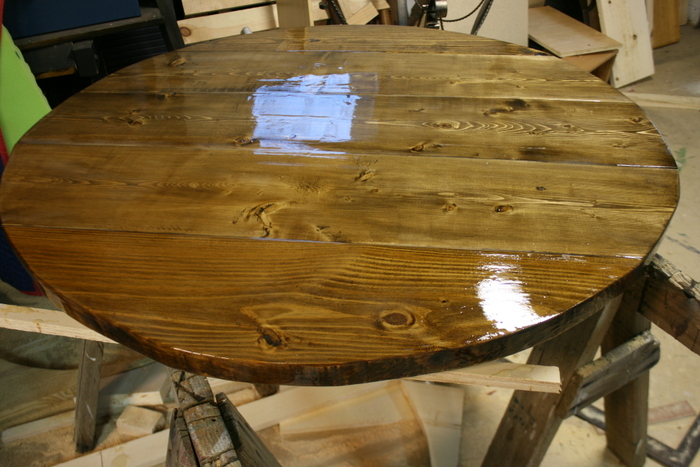
I wet sanded the entire top with 220 grit sand paper and my pad sander. All I did was wipe a section of the table with a wet paper towel and then sand. This evened out some of my mistakes, and dulled the shine at the same time.
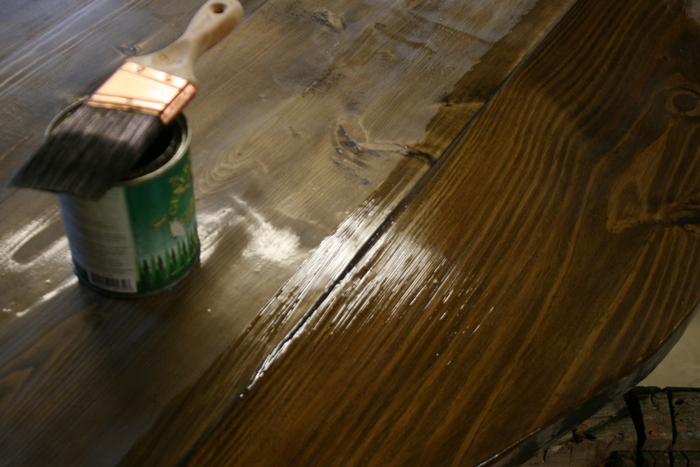
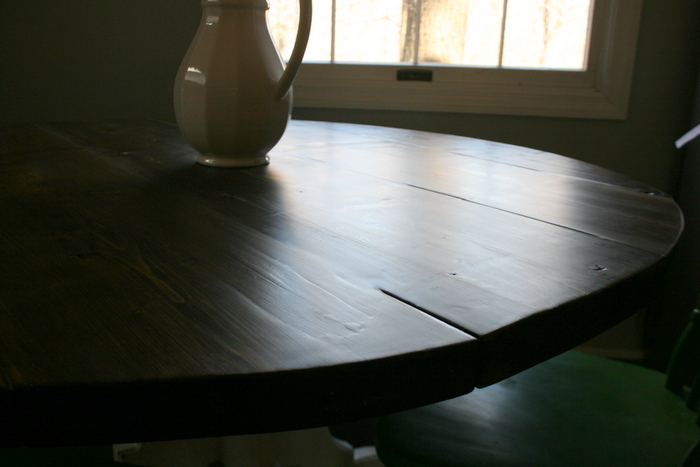
To finish it up I mixed a bit of stain into High Performance Top Coat in Flat finish and gave it one coat which evened out the finish.
Is it perfect, nope. But it’s a brand new table top that already has a lot of character. I plan to try the epoxy resin again but next time I’d try it only as a filler in the cracks and knots rather than ALL over.
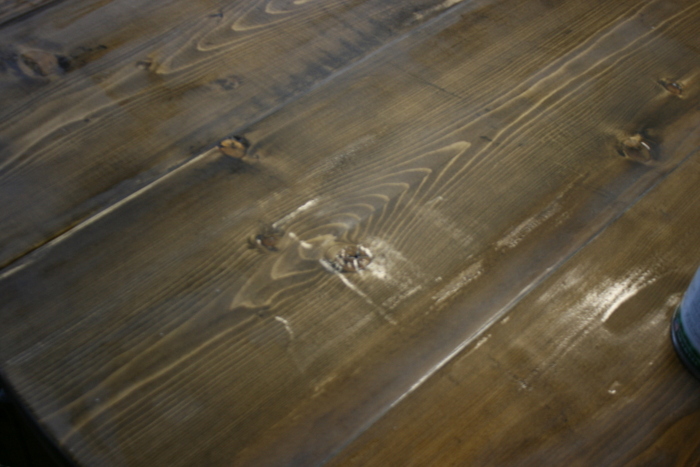
This picture shows that most of the cracks are filled in – the few that are still left aren’t very deep so it should be easier to keep this table top clean.

Will you try resin on a project any time soon? I’m excited to practice with it a bit – I think it could be a really useful tool in my arsenal.
Happy building! I’m back to work in the kitchen…
Until next time,
Jenni

.jpg)
.jpg)
.jpg)
.jpg)


I love That! Did you make the base too?
No, I actually didn’t on this piece. I found it at a second hand shop and just love the shape of it!
does the epoxy work for outdoor use?
Yes, it’s boat epoxy!
Do you use any glue between the plank joints, or is the screws enough?
Yes, glue and screws both are the best way to go!