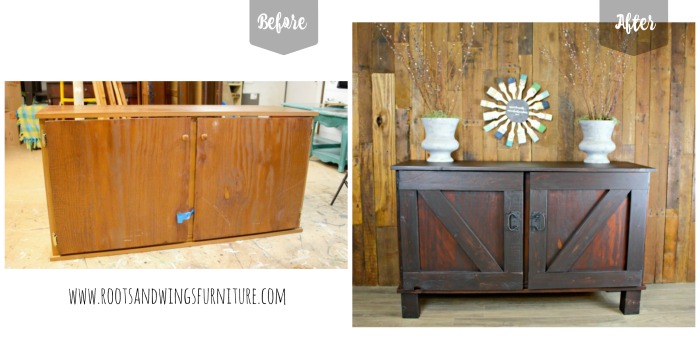
Hey there, I’ve got a great before and after for you today!
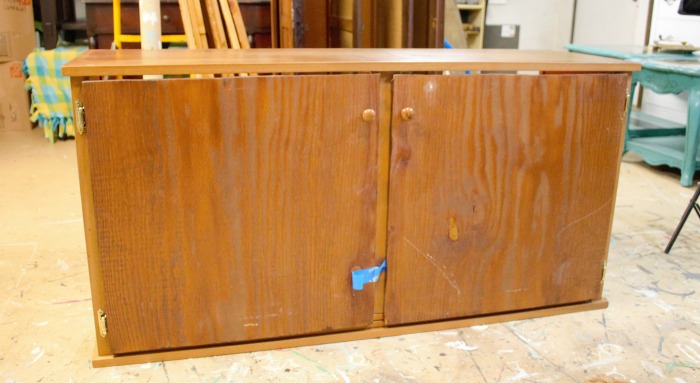
Some friends of ours were cleaning out and getting rid of this cabinet. It had tapered legs when it arrived, but they didn’t last long. It’s a mid-century buffet/media cabinet of some sort that was at one point re-purposed with doors on the front and a few shelves inside.
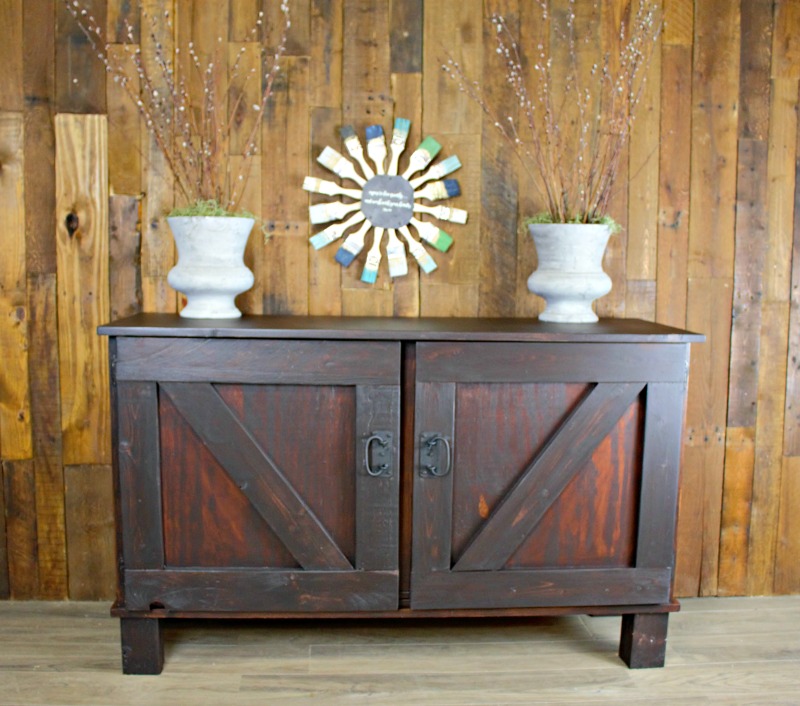
Mid-Century is totally not my style, at all. But with the clean simple lines, all I could see were some barn doors on the front and a perfect long media center. Bam! So that’s what I did.
{Yes, I should be packing, but instead I thought I’d try to use up some scrap wood (that I don’t need to move) and build something. I know, who does that?!?}
There are a few affiliate links included in this post to help you find the products I’m talking about. Using affiliate links costs you nothing, but any income I receive goes to support more fun projects! To see my full disclosure policy, click here.
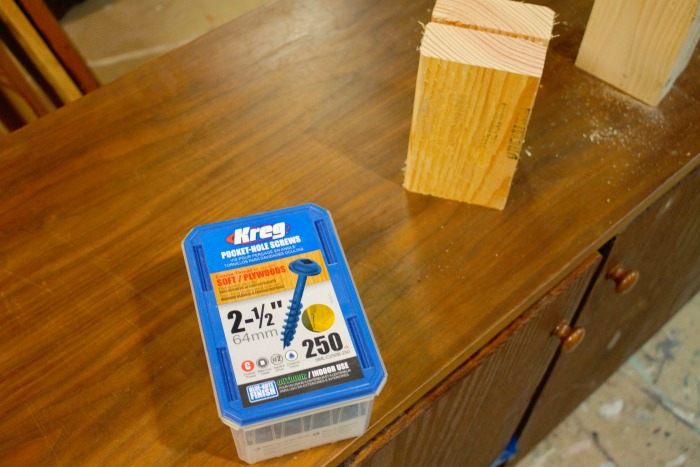
First things first, these are my very favorite screws for building furniture. They are long enough to get through even 2×4’s and they are self tapping, so there’s usually no need to pre-drill. Get yourself some 2.5” screws, you won’t be sorry. I also used wood glue, and my nail gun.
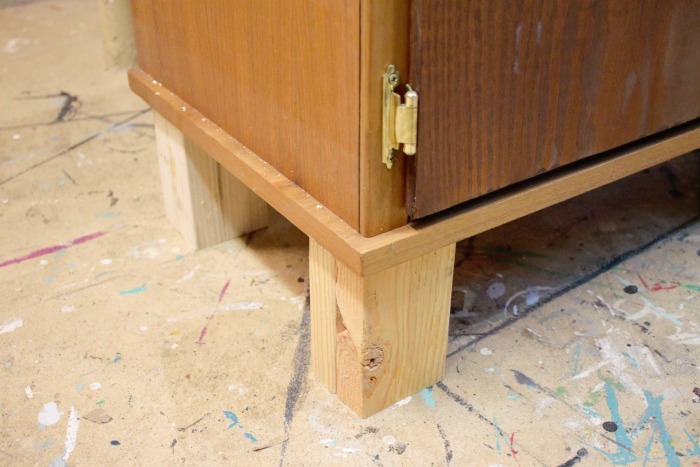
The first thing the cabinet needed was some height. I figured the legs needed to be about 6” high, so I cut some 2×4’s to that length, and beefed them up by gluing and screwing 2 together. This is a rustic build, so using straight 2x4s is okay for this look.
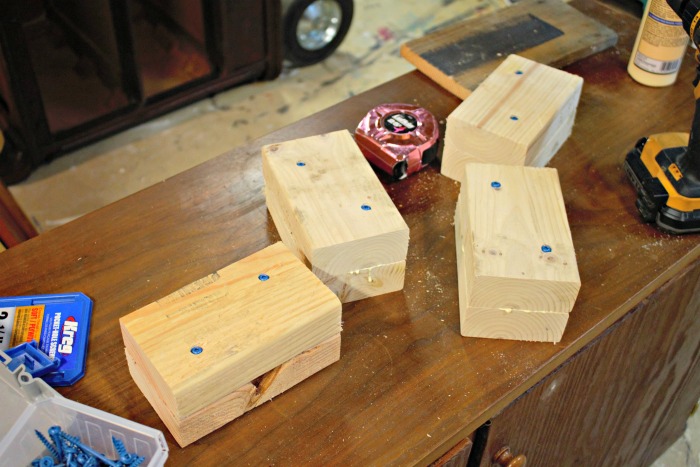
Then I just screwed them to the bottom of the cabinet.
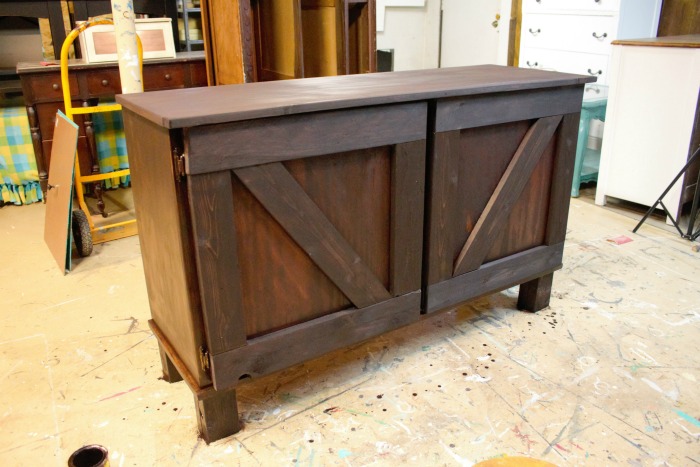
Next I started outlining the doors. These doors are just made from cheap plywood, but when they are trimmed out, you really can’t tell (remember, working with scrap wood and using what I have!). So I outlined the doors and added a cross piece.

Lastly I added a small piece of trim to bump out the top edge and cover the tops of the doors. I screwed those right to the face of the piece, then used wood filler to cover the screw holes.

I sanded the whole thing down with 80 grit sandpaper on my pad sander. Smoothing any rough edges and taking off the existing finish on the cabinet.
This is an imperfect piece for sure, so I wanted to hide it with a dark stain (this will also most likely be going on a very light gray/white wall in our new house and I love the contrast of light and dark in a space). So I applied Espresso Wood Stain all over the piece – wiping it back enough to show a little bit of grain.

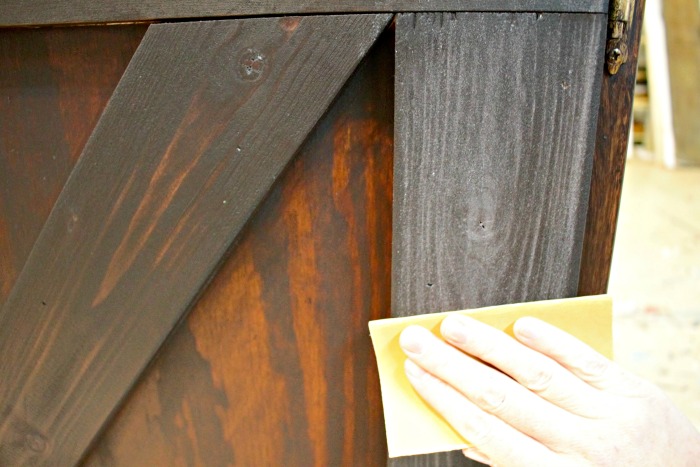
When the stain dries, you’ll notice the wood is a little rough all over – no worries, we’ll take care of this in a minute.
I let the stain dry a couple hours, then was ready for the topcoat – I used General Finishes High Performance in flat finish. Once that first coat is dry, I took my 400 grit sandpaper and sanded down the piece, this knocks off any roughness in the wood that the stain brought up. Wipe all the dust off and apply another coat. Repeat as necessary (most pieces require 3 coats of top coat).
The flat finish gives just enough shine to make it wipe-able without ruining the rustic appearance.
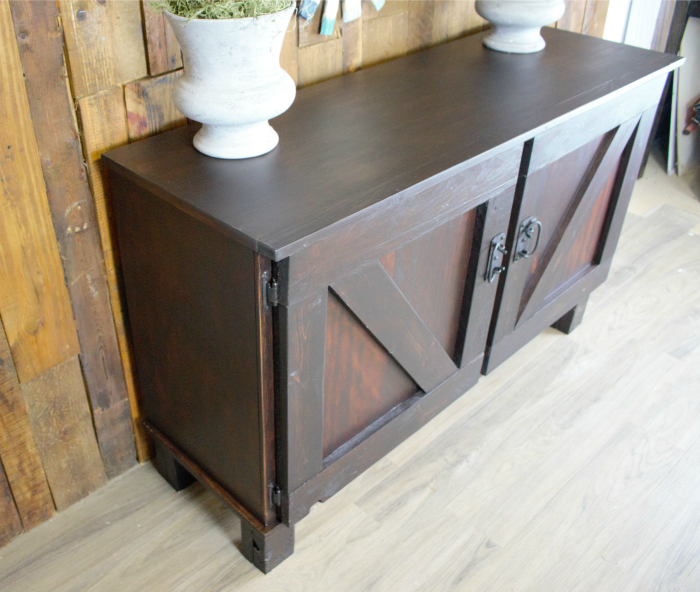
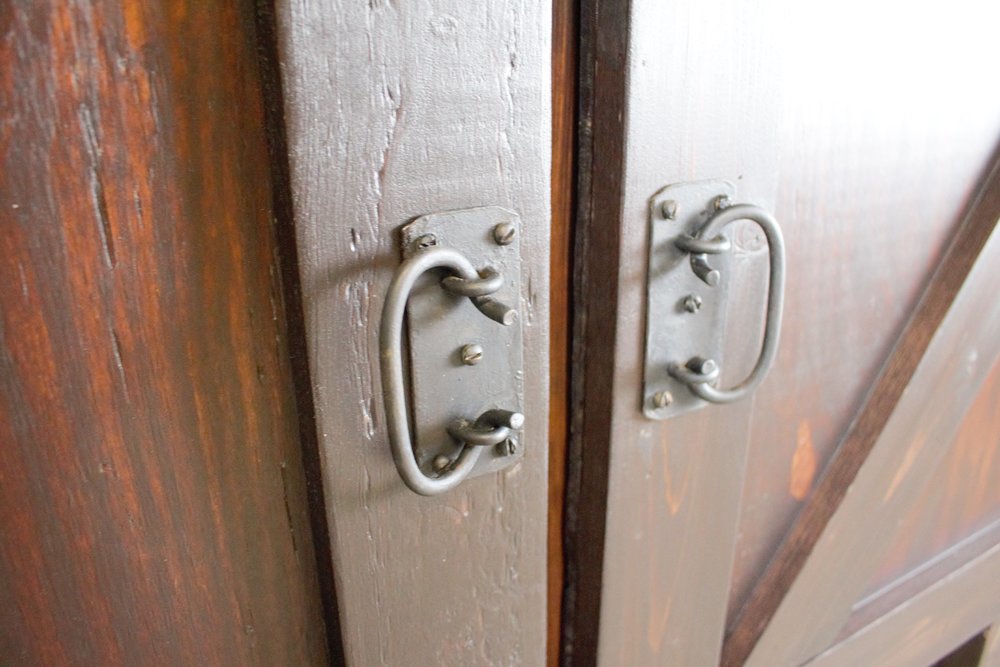
I applied this old iron hardware (touched up with Lamp Black Milk Paint), and painted the existing hinges black too.
And check it out – what a difference a day makes – and a little scrap wood! I’m loving this rustic media cabinet. The best thing, it was FREE! I can’t wait to get it set up in our new house- the wheels are turning, and I have all kinds of fun ideas to share!

So next time you see a piece destined for the trash, re-imagine it a bit and see what you come up with!
Okay, now I’m going to pack…
Jenni


I’d be curious to know if those hinges hold up under the additional weight?
I’m all about the farmhouse except for our master suite which is "country french" with a tendency towards minimalist, NOT shabby chic. I’ve been there, dusted that and so over the excess at this point in my life. We bought a fixer-upper (yes, I had the guts to take one on!), and discovered the only ship lap house in this area to my knowledge…adding plenty of galvanized metal and subway tile everywhere in the bathrooms and kitchen.
I’m hooked on General Finishes, I am "neutralizing" all of my "gold" from my former bedroom, lightening all the "black" from our contemporary log house, and mixing shades of gray and taupe with lots of white! Glazes, lime wash, and distressing projects get interjected between carpentry and taming the neglected lot outside. I’m adding trimming out windows and installing wood floors to my DIY resume.
Now, go pack, girl!
So far the hinges are okay! You are so brave, but I bet that will be a gorgeous project when you are finished!!
Now that is what I am talking about!! Nothing more fun than turning something tossed out to make a great piece of furniture. I love your video tutorials, and your inspiration! Keep it coming!!
Thank you!! Will do! I love makeovers like this too!
That is so very creative and cool-you are one talented gal!!
Question for you: can Feneral Finishes dealers be brushed and rolled or only sprayed, brushed on with foam brush? I want to use it on a kitchen island but don’t want to spray it in the kitchen!!
Love those handles! Makes the whole piece.