Did you ever have a project that you know would make a bit impact in your home, but it just feels daunting. You know how to do it, you even have gathered the materials to do it, it just seems like a tedious project. Well, that’s just how I felt about this staircase makeover. So what did I do? I did every single other project surrounding it. We painted walls, painted trim, painted the floor, painted the doors, until the staircase looked even more out of place than it did to start. Then I did the staircase. I was right, it changes this whole space – just wait until you see these before and after on this project…
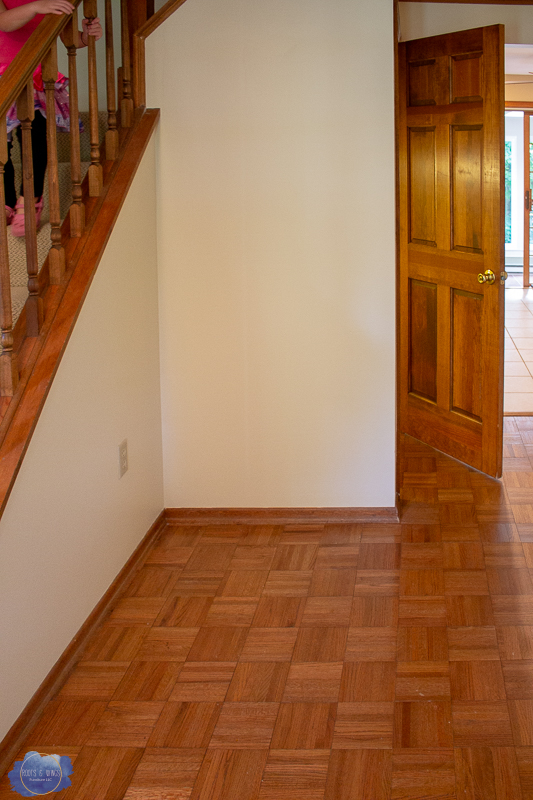
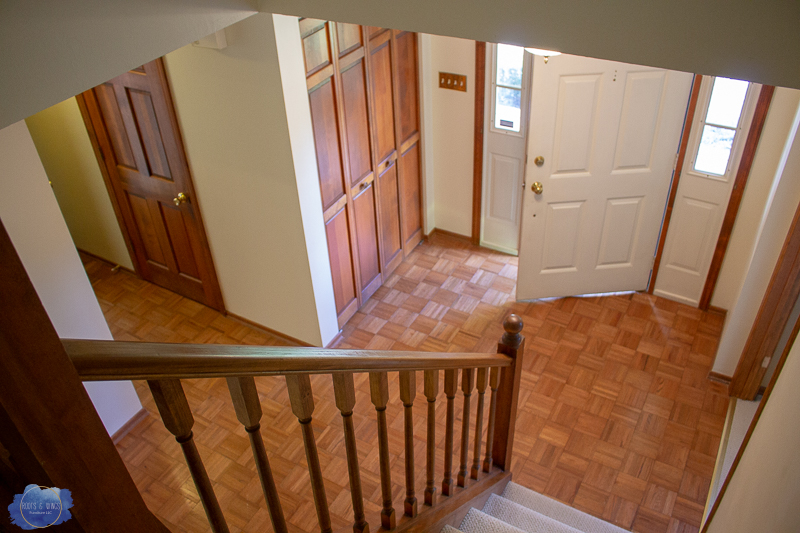
Here’s the staircase and entry way on the day we walked through the house. I called this house Beige Beauty for a reason, it’s got great bones, but boy was it all so bland.
The stairs were all oak (like the rest of the house) and the treads were carpeted in white-ish carpet – you know, the perfect color for a family with 3 kids and two dogs – it was time for that carpet to go!
This post contains affiliate links to help you find the tools and supplies I’m using. Clicking these links pays me a small commission at no additional cost to you. To see my full disclosure policy, click here.
Supplies for a Staircase Makeover:
- Hammer
- Pry-bar (you really do need one of these for any flooring or trim project)
- Staple remover (or flat head screw driver)
- Plyers
- 120 grit sand paper
- wood filler
- Semi Gloss Latex Paint – I used Behr in off the shelf white
- Water Based Wood Stain (in a mix of 50/50 Walnut and Antique Oak)
- Topcoat
- Painters Tape
- Stair Runner – mine came from Costco – make sure they are no-skid on the back!
- Staple Gun
Here’s the makeover and how I did it:
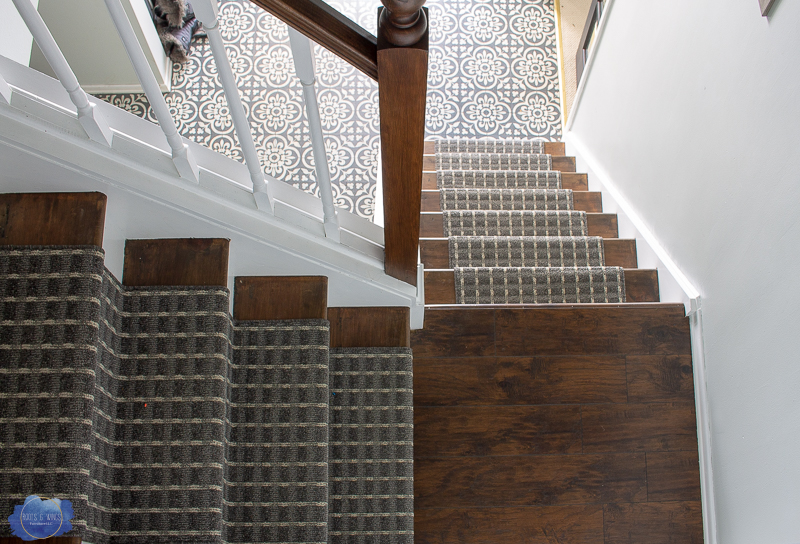
Look at the entry way now! Quite a difference don’t you think? This is exactly what you see as you walk in the front door, and it’s so much more welcoming than before!
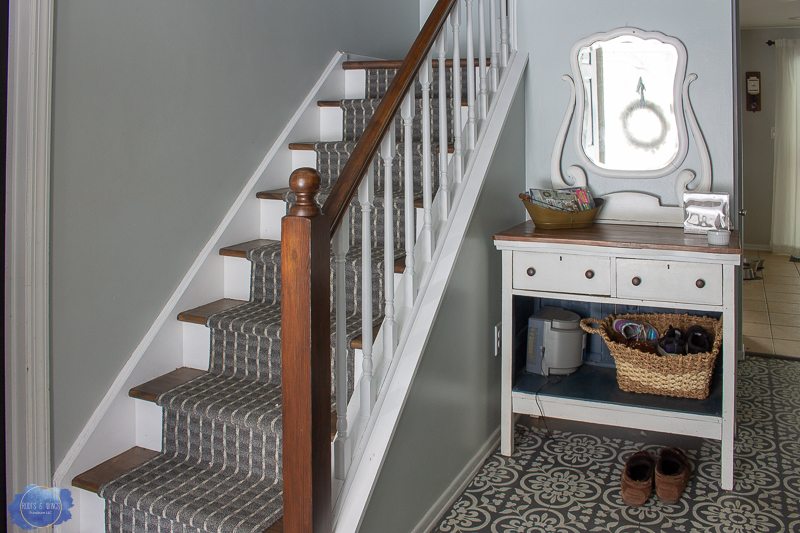
The carpet is gone, the treads were stained, the risers and spindles were all painted. I did keep the banister and newel posts stained, just for a little design element that was a little special.
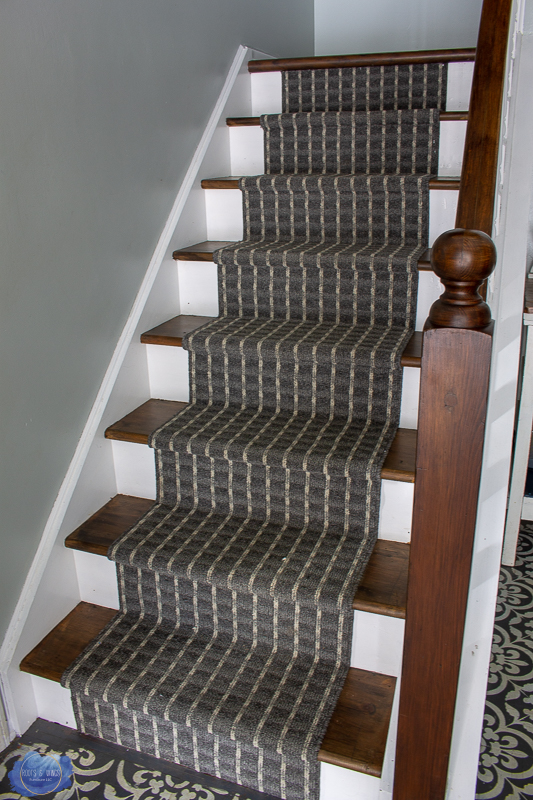
The runner is a Costco floor runner, they cost $10 each and I used 4 to get all the way up the steps, they are the most inexpensive, easiest to install runners you can imagine. The stripes were a little bit challenging, just a few staples and the no-skid backing keep this in place just perfectly. The stair runner really adds a warmth, texture and special element to the staircase makeover. Also because they were only $10 each I wouldn’t feel bad replacing them every couple of years, or if one got a stain that just wouldn’t come out.
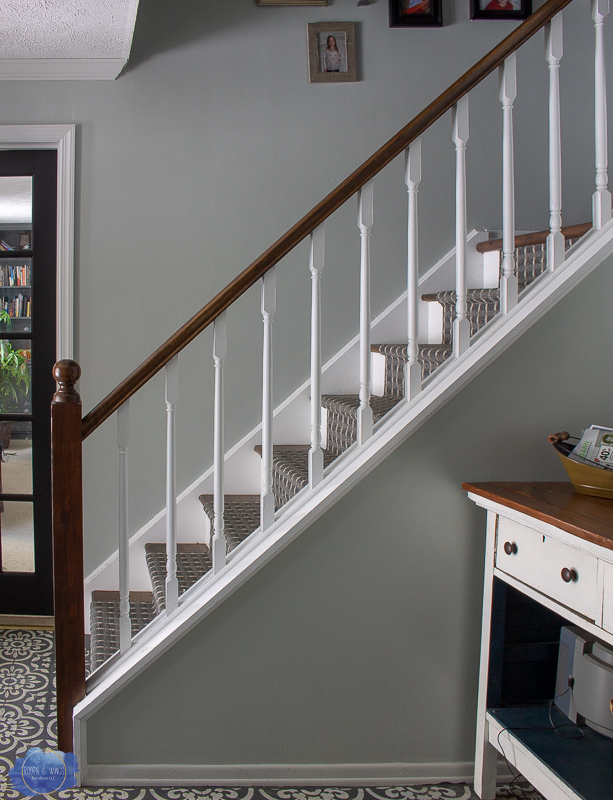
The landing had already been replaced with waterproof laminate flooring. But I think I got the posts and treads to match the landing perfectly!
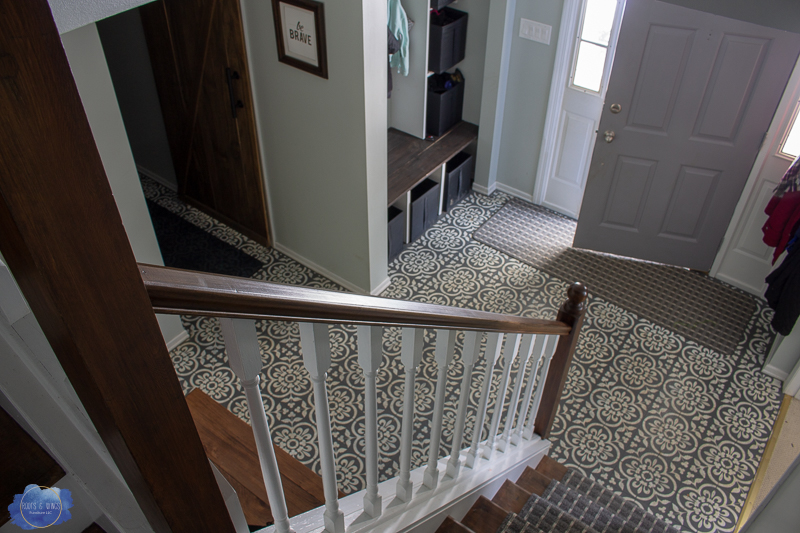
One more glimpse of how far this space has come…
A note on this, when we moved into this house, honestly I didn’t like it. It had not an ounce of style. It was the blandest, beige-st most oak filled house I could imagine. But photos like these next two remind me of how far we’ve come in just 18 months. Just a bit of hard work, some imagination and A-LOT of paint can get you so far!!
Just in this photo alone, you can see:
- how to build a barn door (we’ve added 3 so far),
- how to makeover your entryway closet (this has been no joke, a life changer),
- how to paint hideous parquet flooring (you’re welcome),
- how to paint oak trim white (I’m seriously throwing a party when I finish painting trim in this house),
- how to use General Finishes to paint your interior doors (they’ve held up incredibly well),
and then just a whole lot of wall painting in between.
If that doesn’t give you hope for a home you may not love, I don’t know what will. So pull out some paint, and get to work!! This staircase makeover is finished!
Until next time,
Jenni


The stair-hall looks amazing! Great job! I don’t know how you have done so much in just 18 months. Way to keep on keeping on! In past homes I have painted stained trim and doors white. And it is a bear of a job! I’ll be looking at your video on how you have done that job as well. Your before and after photos of the stair-hall make over encourage me to consider new ideas and possibilities in older homes. Thanks for sharing your projects. 🙂
Thanks for being here with me Pam! This house has been a fun challenge, it’s good to look back and see progress though. It really encourages me to keep going!