
Hi friends!
I want to introduce you to a new friend today, Vicki, from Entri Ways. She loves to blog about all things in a creative (in her home, business, and life), so I asked if she would pop over and give us a tutorial. Let me tell you, this is a fantastic idea she has! My front door looks just like this, so it got my wheels turning…
Without further ado, here’s Vicki…
Thank you to Jenni for allowing me to drop in today. Today I’d like to share with you a new way to both decorate and add a little privacy to your front entryway.
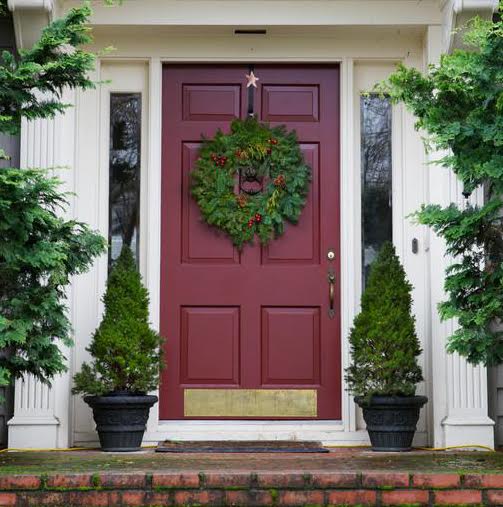
New England is well-known for their colonial homes. One of the key features of these homes is a front door with sidelight windows – the tall, thin, fixed windows on either side of an entryway door.
This architectural feature will never go out of style. Homes have been featuring sidelight windows for decades and new homes are still being designed with them. These windows may be small in size, but they let in lots of light and brighten an entryway.
The downside to having sidelight windows, thought, is that they also allow curious eyes to peek in, so there are times when you may want to cover them up.
When my husband and I built our New England Colonial home, we chose a front door that included half sidelights on either side of the front door. We live on a moderately traveled suburban street and at night I feel like all eyes can see inside. Add to that the fact that my home is an open layout. We barely have any walls so you can see the entire downstairs area from the front door. I love the layout, but it also means there’s no way to pretend you’re not home if someone rings the front doorbell. They can see you!
The problem is sidelight curtain styles found in stores haven’t changed in over 50 years. You may remember the white and ivory sheers or lace panels hung from tiny, metal rods and scrunched up into heavy pleats. Yes, these old style sheers are still sold in stores today; but there was no way I was going to screw metal rods into the new woodwork or hang lace!
So I got to designing.
My goal was to create a window covering that:
• was modern in style and hung flush against the window frame (no heavy pleating!);
• didn’t require any damaging hardware;
• and could be put in place for privacy at night and taken down quickly and easily during the day to let in as much natural light as possible.
What I came up with is a design now known as Entri Window Panels – sidelight curtains made in a modern style with modern fabrics. The Entri Window Panels pre-made and sold in my own shop at Entri Ways are designed with buttons and an adjustable width to accommodate different sized windows; but I know many of you love to DIY. So today, I’m going to share with you how to make your own version of my Entri Window Panels.
HOW TO MAKE A MODERN CURTAIN FOR A SIDELIGHT WINDOW
STEP 1: CHOOSE A MODERN FABRIC Choose a fabric you love and that coordinates with your home. Go bold and bright with a stunning print or opt for a more subtle tone. Choose a fabric that’s sheer, semi-transparent, or opaque. The choice is yours!
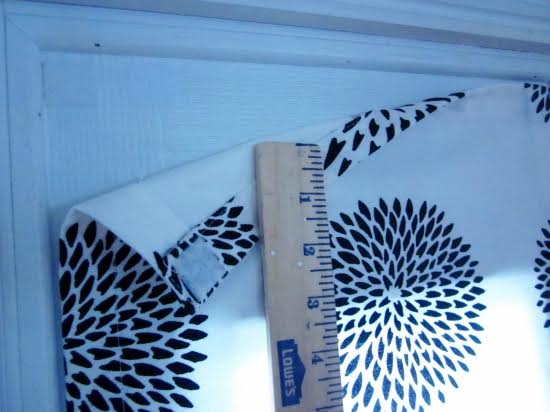
STEP 2: MEASURE
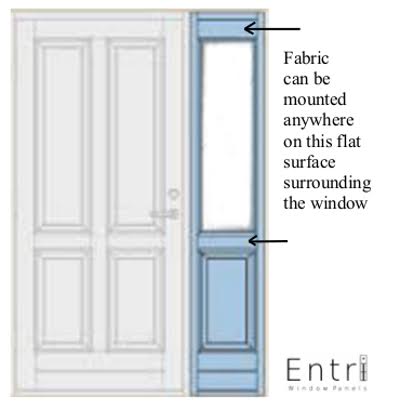
Begin my measuring the sidelight window. The window is typically surrounded by a thin molding so you’ll want to measure just outside this molding since the finished curtain panel will be mounted on the flat area just surrounding this molding.
STEP 3: CUT FABRIC TO SIZE
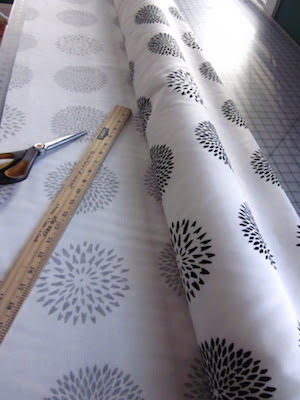
Take your prefered finished-size measurement and add 1-1/2 inches to each side. So if you measured 11″W x 38″L cut the fabric at 14″W x 41″L.
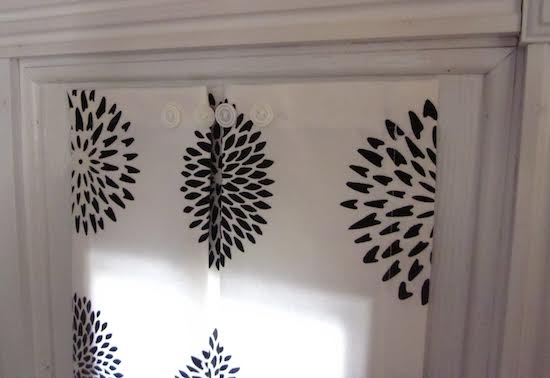
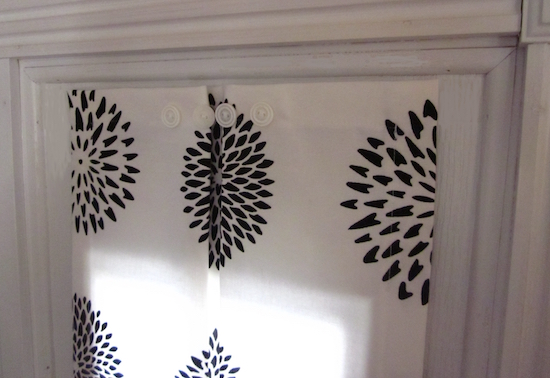
Note: These dimensions will result in a flat fabric panel (no pleat). If you prefer the look of the pleat, similar to the Entri Window Panels and as shown in my photos, simply add 2 inches to your width cut size; making your cut size 16″W x 41″L. After Step 4 is completed, fold in the fabric to create the single pleat and secure it top, center, and bottom with a cross stitch.
STEP 4: HEM ALL 4 SIDES
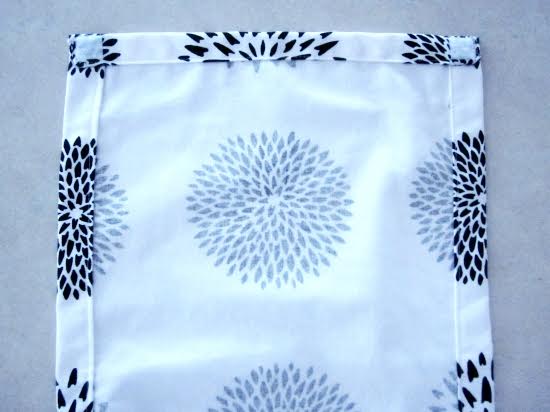
Fold and sew a 1-inch hem on all four sides of the fabric. To do this, first fold your fabric edge in 1/2 inch and iron to create a stiff crease. Then fold your fabric edge over again another 1 inch. Secure with common pins and do this along all four sides. By folding the fabric over twice, you create a clean-edge hem that won’t fray.
STEP 5: ATTACH HOOK & LOOP FASTENERS
The fabric panel is mounted to the window frame using hook & look fasteners (aka: Velcro®). You’ll need to purchase two different kinds, both of which are available by the foot at JoAnn Fabrics. The first is a loop that attaches to the fabric. Either the sew-on or iron-on version works. Cut this strip into four 1-inch squares and secure each square to the corners of your curtain panel. The second side is the hook side that will stick directly to the woodwork. Be sure to purchase this in a sticky-back in a color that blends best with your woodwork or
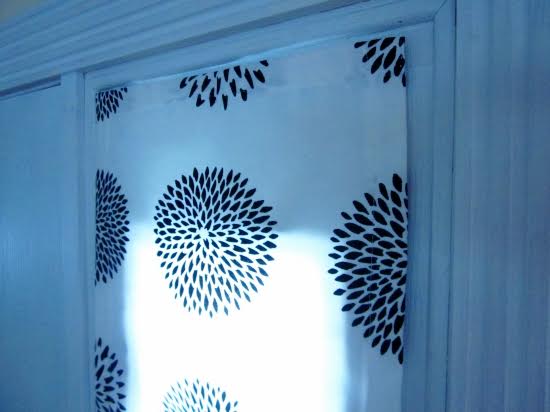
in clear (which I prefer).
Attach the sticky-back hook fastener to the loop (which is already secured to the corners of your fabric), peel the back off the sticky-back fastener, and press it in place on your woodwork. The sticky takes about 24 hours to become fully secure, but don’t worry it won’t damage your woodworkeven if you decide to remove it months from now.
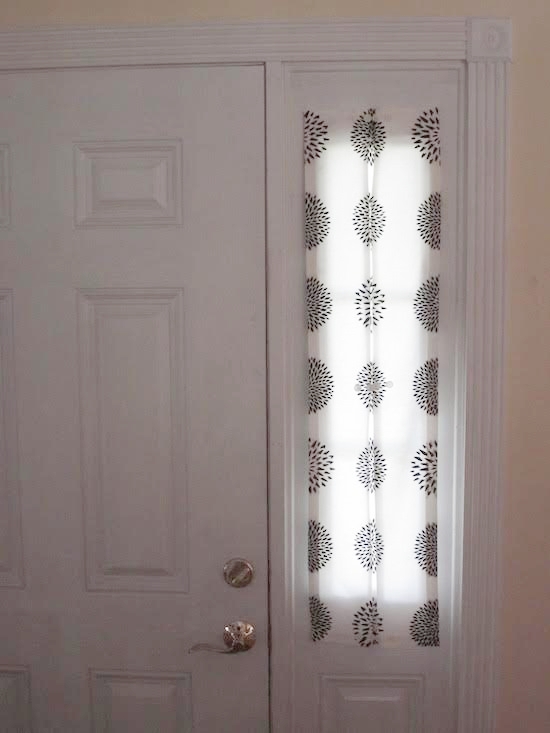
STEP 6: ADMIRE YOUR WORK!
Congratulations on another home design solution solved! For even more, fabric inspiration, you can check out Entri Window Panels at EntriWays.com.
How smart is this DIY project?!? I love this idea. If sewing isn’t your thing, she custom makes these panels and sells them from her shop, so be sure to check that out here.
Hope you all have a beautiful weekend!
Jenni

.jpg)
.jpg)
.jpg)
.jpg)


