Looking for a statement piece for your home?? This is it!! Large wall clocks are popular – on a stair case wall, over a mantel, as part of a gallery wall – the problem is they can be pretty pricey – unless of course you make it yourself!!
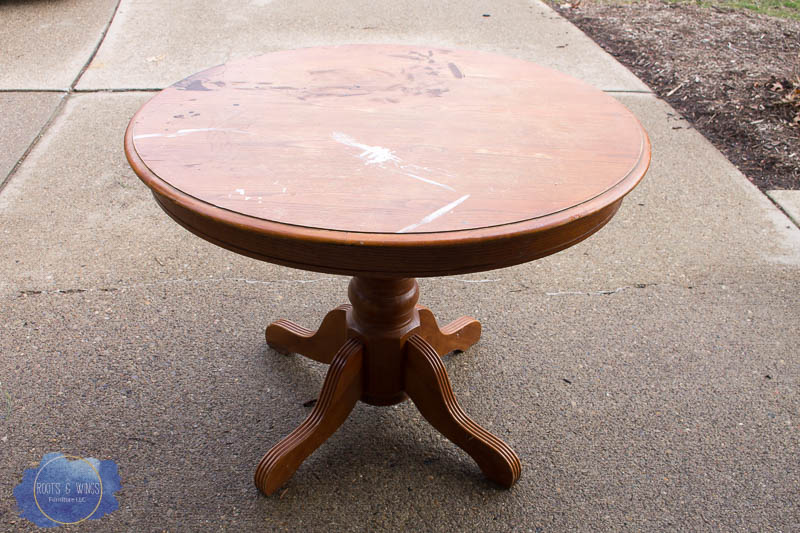
I don’t know about you, but I see these little round four top tables pretty often. This one in fact was found on the side of the road by a friend who couldn’t resist rescuing it for me. They are a little to small for most families, so I thought I’d turn it into something completely different! Here’s what I did!
This post contains affiliate links to help you find the supplies I use and recommend. Using these links pays me a small commission, but costs you no extra. To see my full disclosure policy, click here.
Large DIY Wall Clock
Supplies needed:
–Round table top – this one is 40″, I made another one a bit smaller at 36″
-Sander and sandpaper (80 grit)
–General Finishes Winter White Glaze (for the white clock)
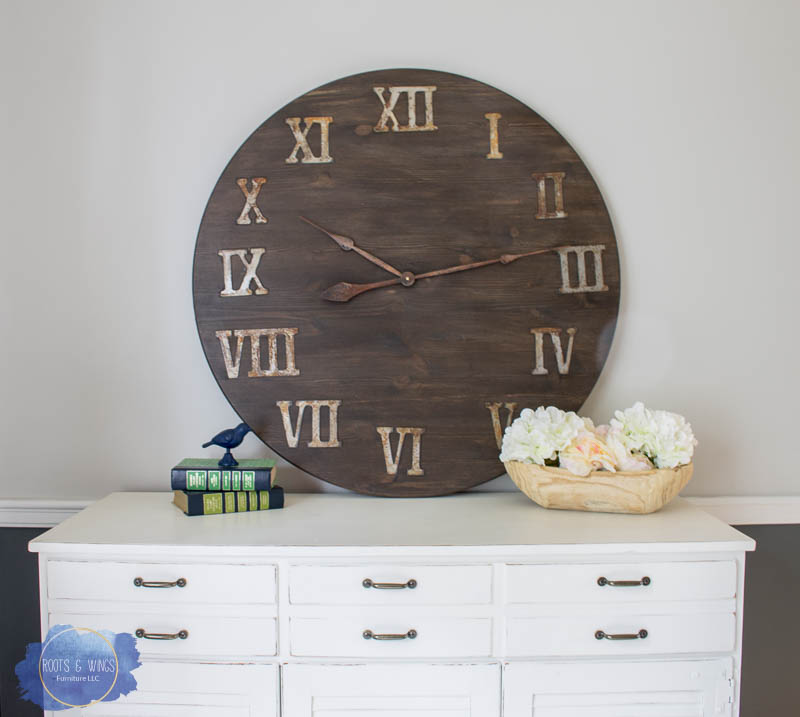
– Weathered Gray Water Based Stain topped with Walnut Water Based Stain (for the stained clock)
-OR any other color of paint I used Dixie Belle Driftwood in the video
-Hammer and chisel OR Dremel Multi Max
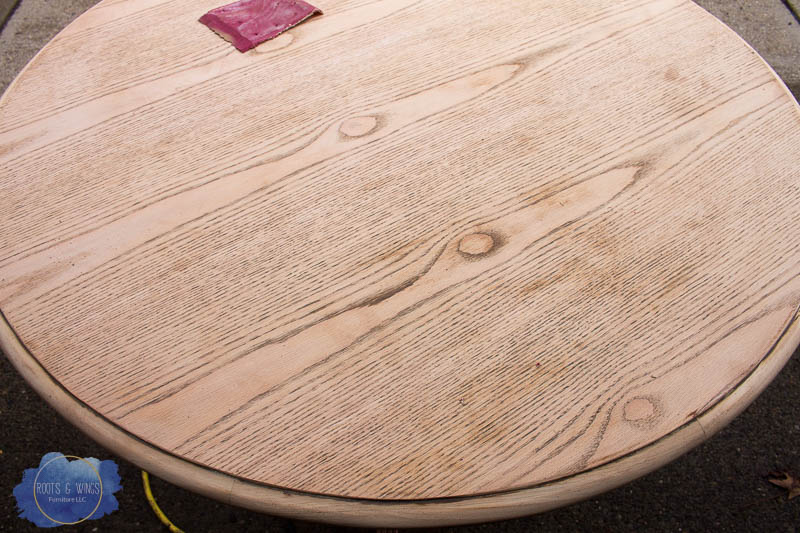
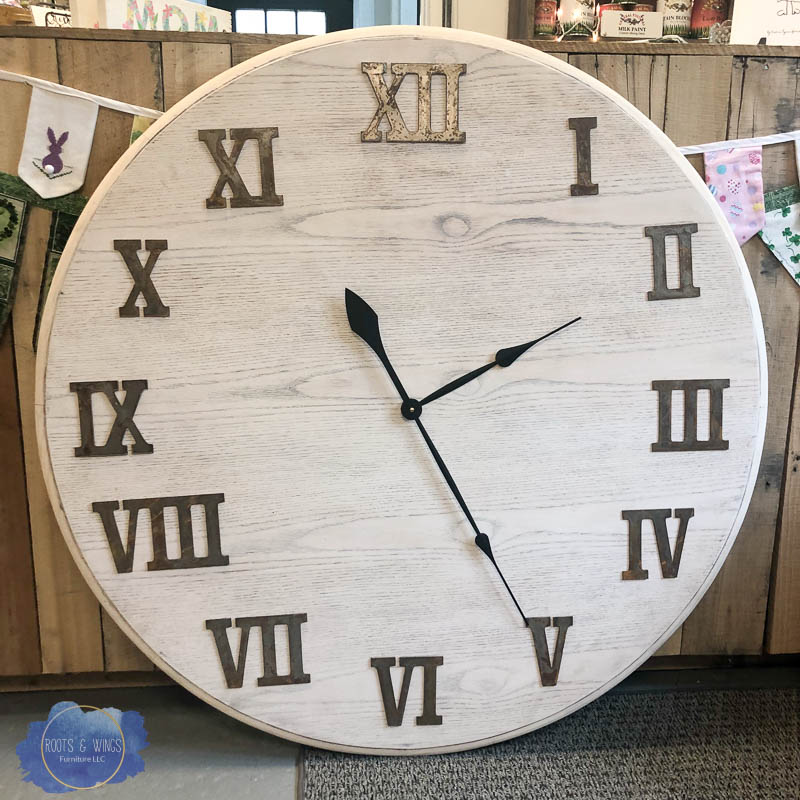
If you want a raw wood look, sand the table top to raw wood using my pad sander and 80 grit sandpaper. If you’d like to paint your table, you can do that instead!
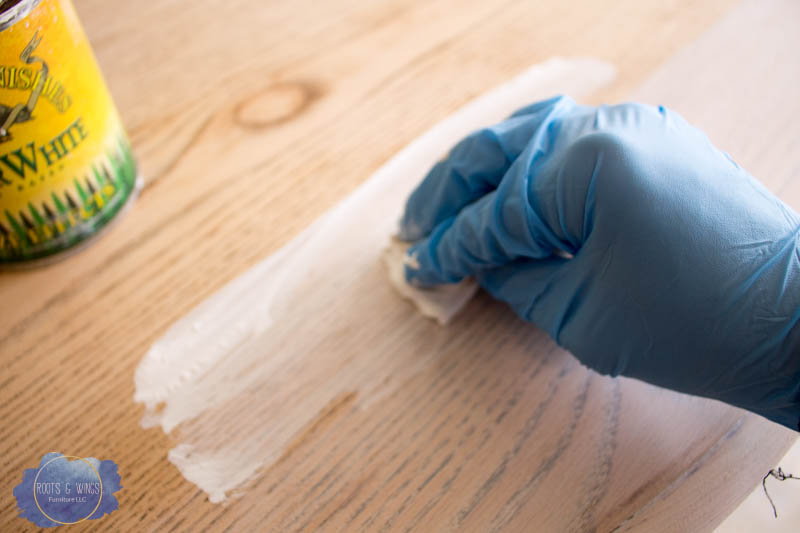
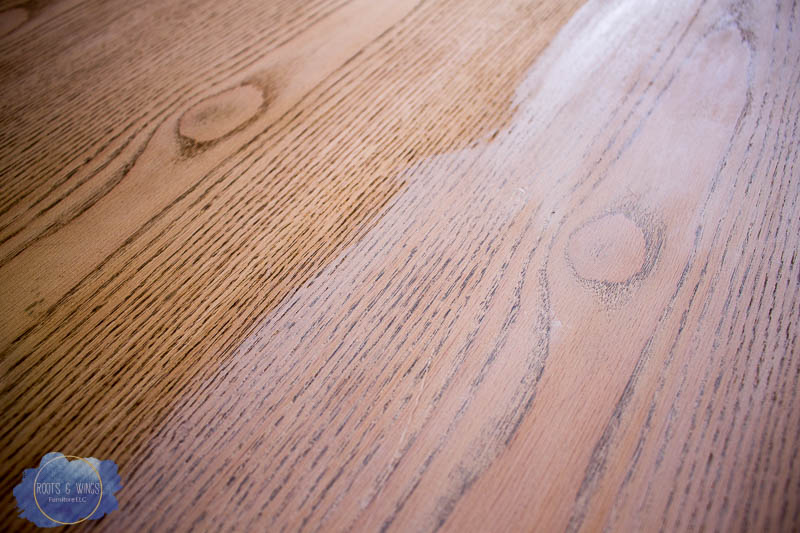
I wanted this to have a bleached wood look without actually bleaching the wood, so I grabbed my can of General Finishes Winter White Glaze, a rag and gloves and applied the glaze – wiping it off immediately.

It gave the oak veneer the coolest look.
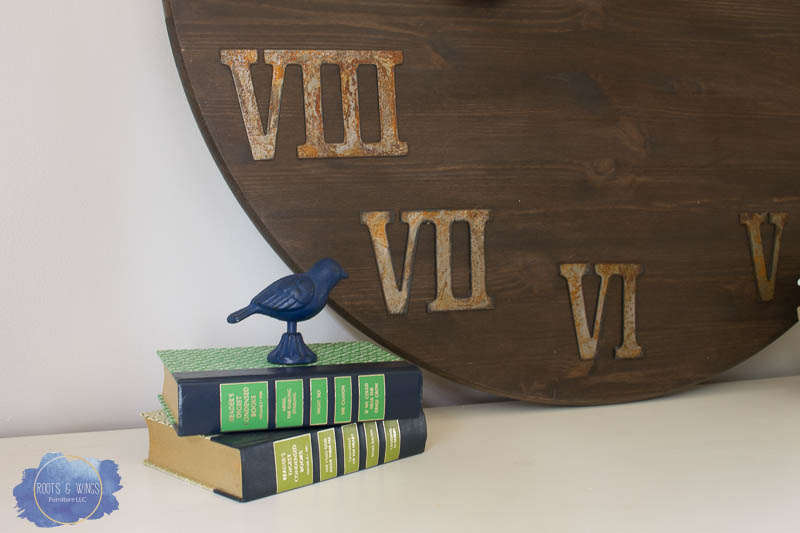
Once the glaze was dry, it was time to add the roman numerals (UPDATE: in the video I installed the clock mechanism before the numbers, and I think that’s a better way to go). These rusty numbers are so much fun, I love the character they give the clock! I glued them on with E6000.
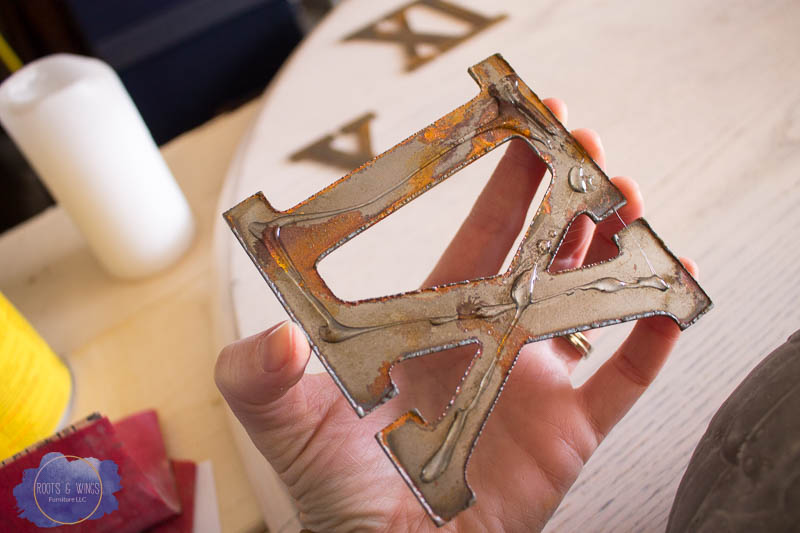
I weighted each number as the glue was drying. This looks ridiculous, but we don’t have rocks in our yard, so I grabbed anything heavy I could 🙂
This should go without saying, but check and double check your numbers BEFORE gluing them down (see my mistake??). My husband caught my mistake here, and I was able to pry the number off and re-glue it! Oops.
Also make sure the numbers line up straight across, straight up and down, etc. Those numbers being off will drive you batty otherwise.
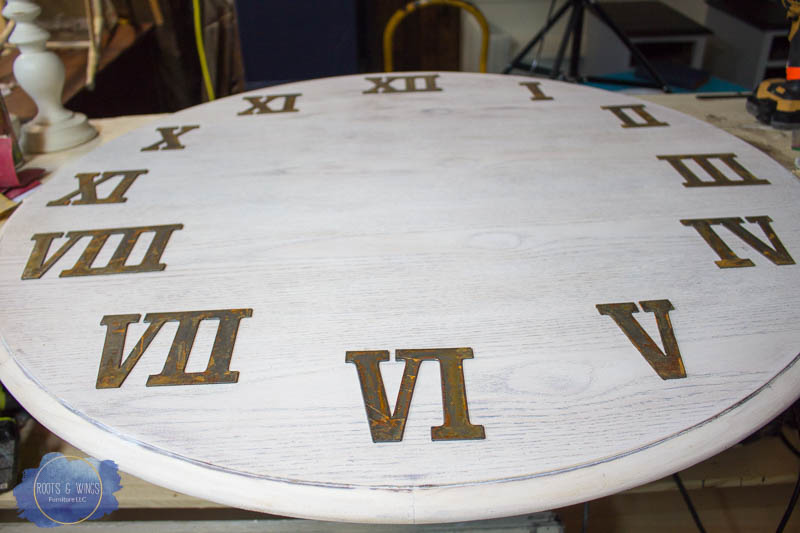
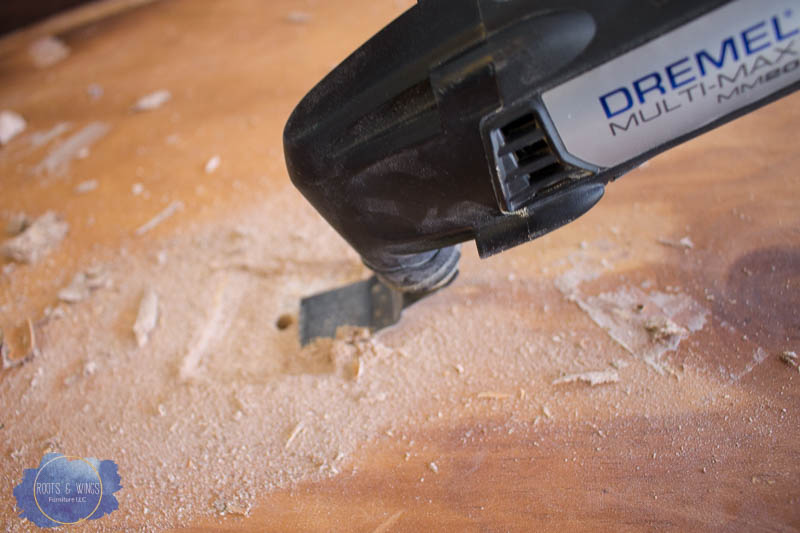
When the numbers were in their proper order, I drilled a hole directly through the middle for the clock hands and mechanism. Get as long of a shaft as you can, it will save you some time.
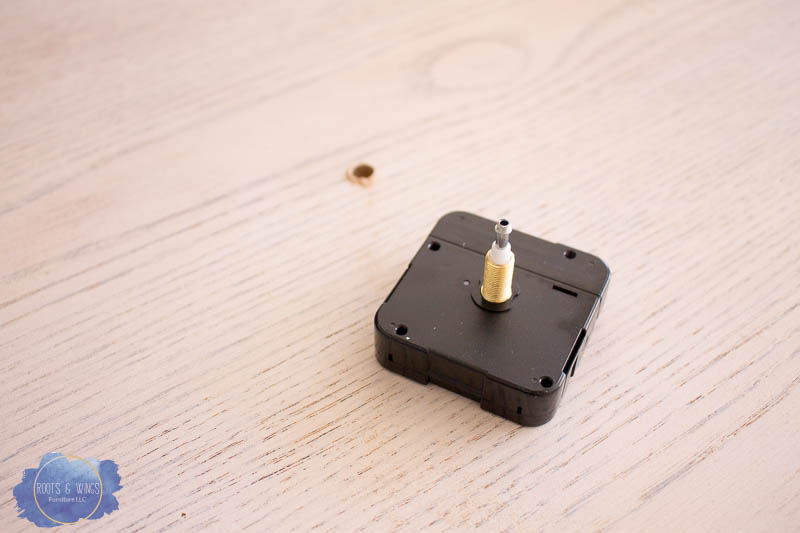
This shaft wasn’t quite long enough, so I used a hammer and chisel (and later my Dremel Multi Max) to create a space for the clock mechanism to fit into.
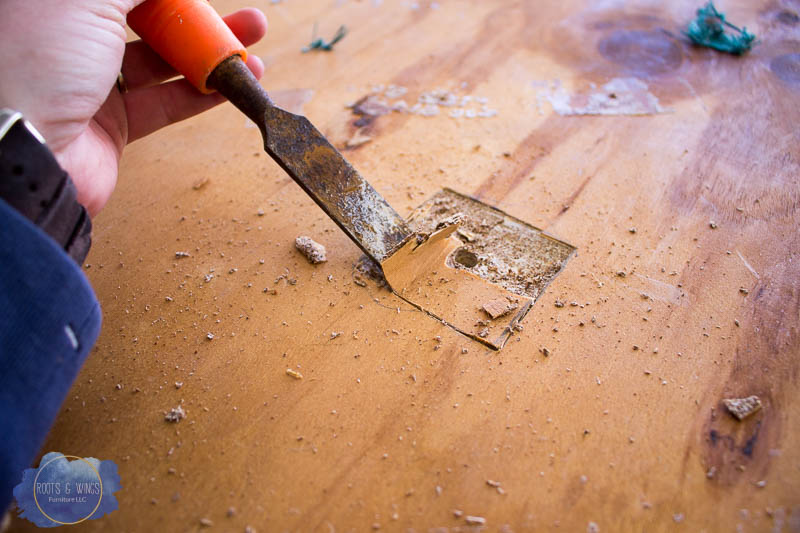
This was the hardest part of the whole project. And it’s not really hard, but does take a little time to get the right depth for the clock box to fit into on the back of the clock.
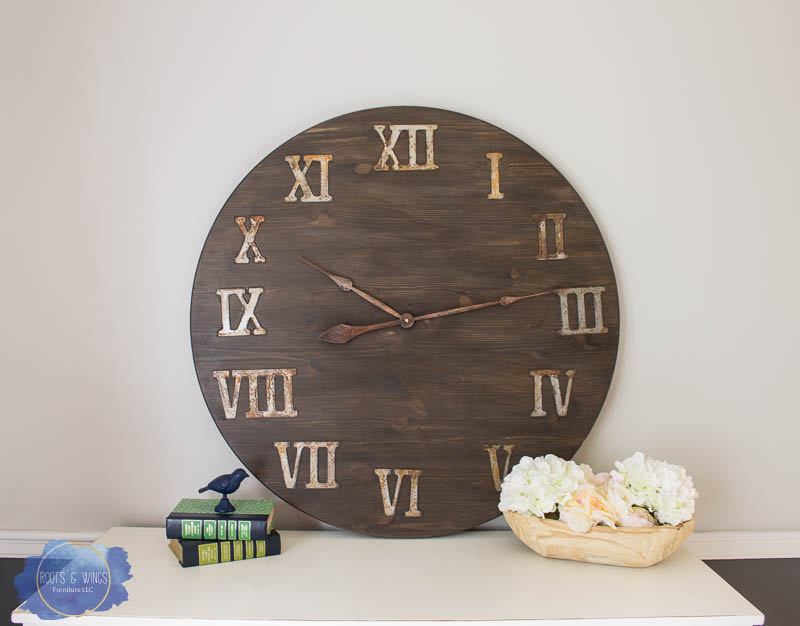
Here’s the finished large wall clock – isn’t it fabulous?!
Here’s the wood stained version of it – I used rusty hands for this clock. I love this one just as much!!
Next time you see one of those little tables at a thrift shop or on the road side, grab it and use some imagination to make a large wall clock!
Until next time, stay creative!!
Jenni


Perfect! I’d love to be talented enough to make my own clock 🙂 For now, I need to stick to the one I got from FormAdore – there’s a Polish brand there that makes absolutely stunning, modern designs. Worth giving a browse! 🙂
All the best for you.
Love the clocks and they actually work. Have to remember these…thank you for the tutorial
Dee
You are welcome!!
Thanks so much Jenni,
What a great job, and it shows me how to make my own big wall clock. I have been wanting to make a kitchen clock out of an old timber chopping board and couldn’t work out how to fit in the mechanism. Now I do 😊
Yay! Good luck!
wow what a beautiful clock .you are grate artist. congratulation.
Thank you!