Hello there!
I’ve been (still) working hard in the kitchen, and just finished up the cabinets! I thought I’d show you what they look like and exactly how I did it. I’ve learned a few new tricks since the last time I painted the cabinets so I thought I’d share.
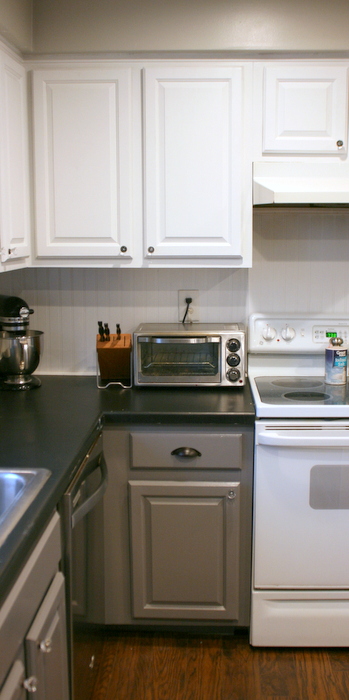
I’ve been eyeing the tuxedo kitchen look for a while – dark on the bottom and bright white on the top. So I decided to go for it in my kitchen too.
I was starting with already painted cabinets – I painted them from cream to white when we moved in 4 years ago. I used glossy latex paint, and while it held up fairly well, it was time for a fresh coat of paint! I decided to go with General Finishes Milk Paint for my makeover this time because I wanted to see for myself how it would stand up to the test of a kitchen.
This post contains affiliate links to help you find the products I’m talking about. Any affiliate income goes to support new and exciting projects. To see my full disclosure policy, click here.
I removed all the doors and sanded them down with my palm sander and 220 grit sand paper. I was careful not to sand through the paint but just to rough up the surface enough for the paint to stick. Then I cleaned them with a solution of 50/50 Denatured Alcohol and Water. Wiped them all down really good and let them dry. Now they are ready for paint…
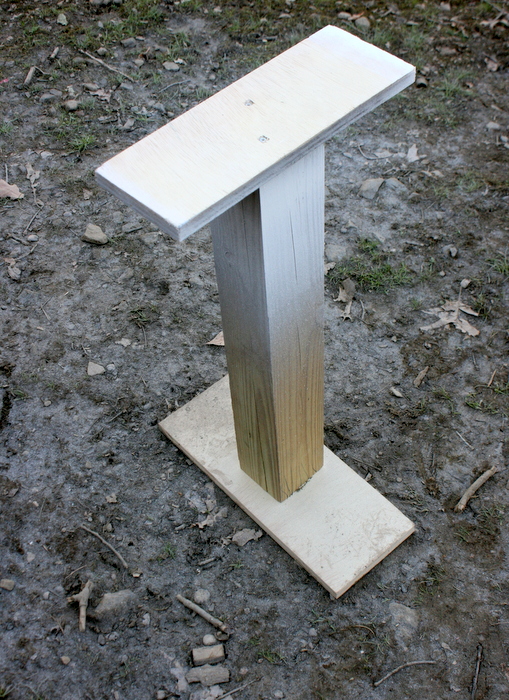
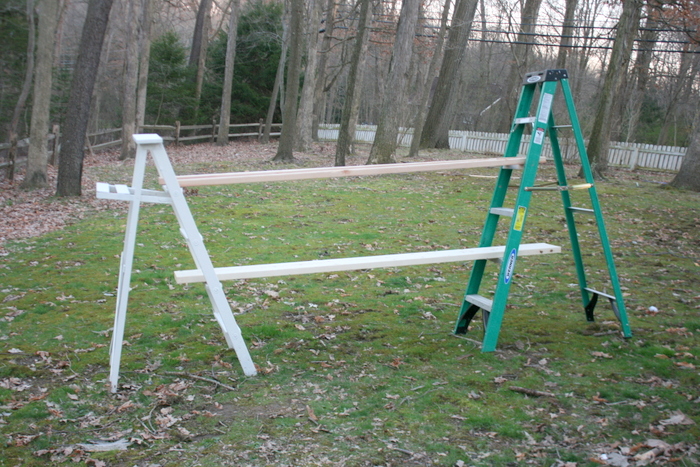
Next I set up my spraying station, I made a spray stand from a few pieces of scrap wood and set it up outside.
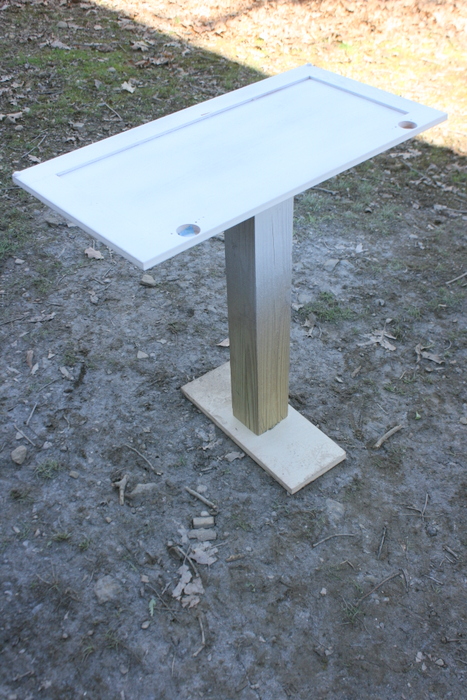
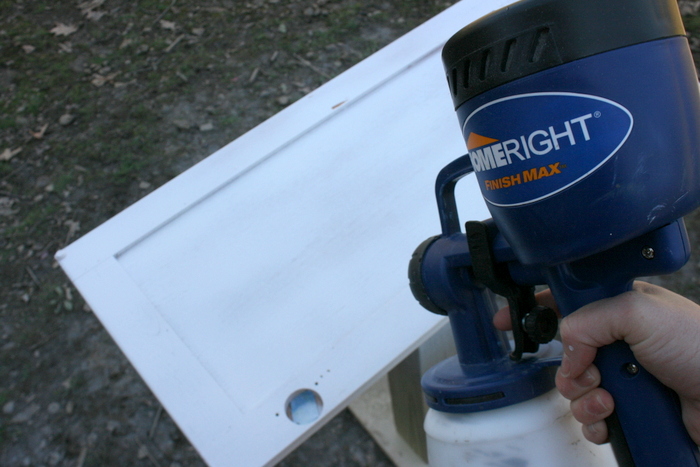
Using my HomeRight Finish Max, I sprayed the backs of the doors first, let them dry, then sprayed the fronts. I followed the Finish Max directions and did thin my paint just a bit with water.
You just keep the sprayer at an even distance away from the cabinets, rock back and forth on your feet as you move the sprayer from side to side for an even spray. It was not hard at all, and I didn’t notice any drips!
Note – I was spraying some old and some new cabinets. For the new (oak) cabinets to go white, I also used primer. I used General Finishes Stain Blocking Primer to be sure none of the oak finish would bleed through on my white cabinets. If you can’t find GF Stain Blocker, Kilz would be the second choice.
Here’s how I set up my drying racks… not fancy – but it worked! Two ladders with a few boards between for the cabinets to lay on as they dry. It was a warm enough day that the cabinets dried pretty quickly which allowed me to do coat after coat.
After my cabinets were all dry, I installed the new hinges and re-hung the doors. I left my touch-up coat and top coat for after they were hung because I knew a few scratches were inevitable when installing new hinges.
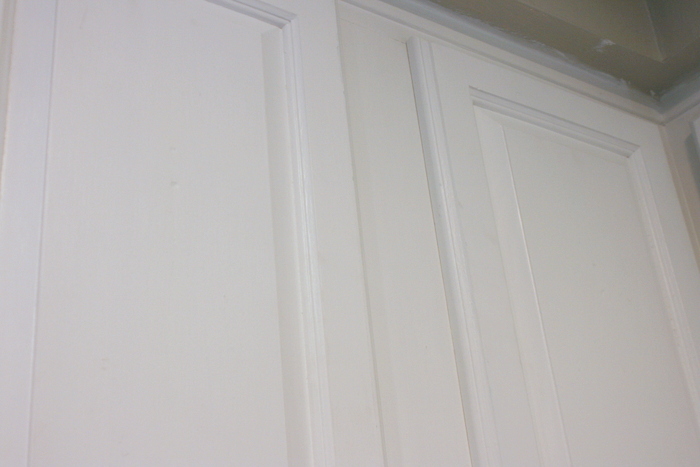
Below is a good example of the sheen of the finish – the first photo shows the milk paint before any top coat.
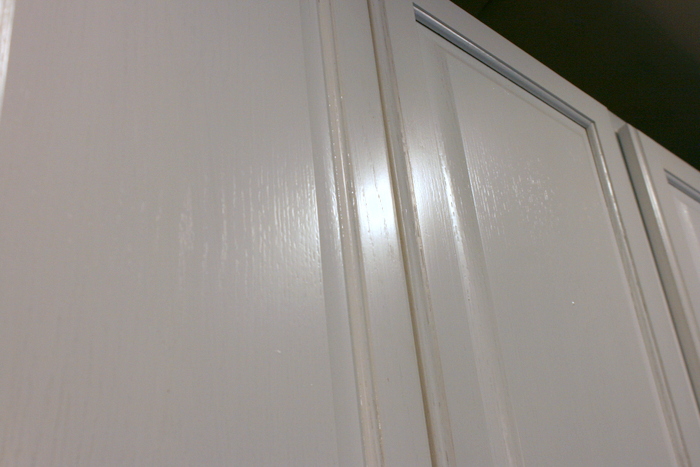
This photo shows the coat of High Performance Top Coat in Flat. It’s a more casual look than a high shine (if you want a shinier finish go for the Satin), but it’s still wipe-able.
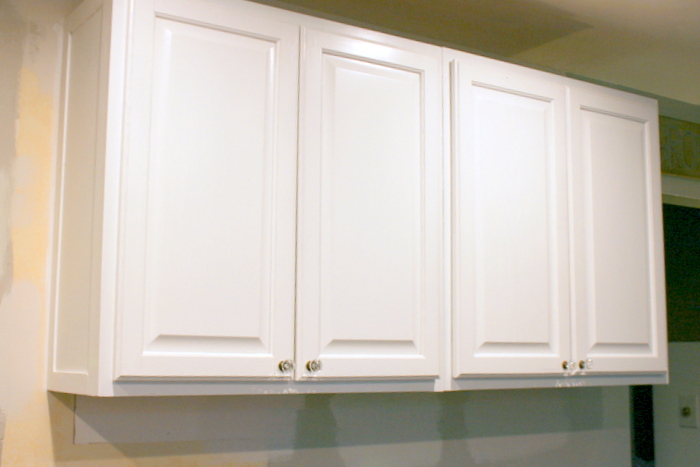
I used Snow White Milk Paint for the uppers.
For the lowers I used a mix of 50/50 Driftwood & Snow White Milk Paint. It goes really well with stainless steel.
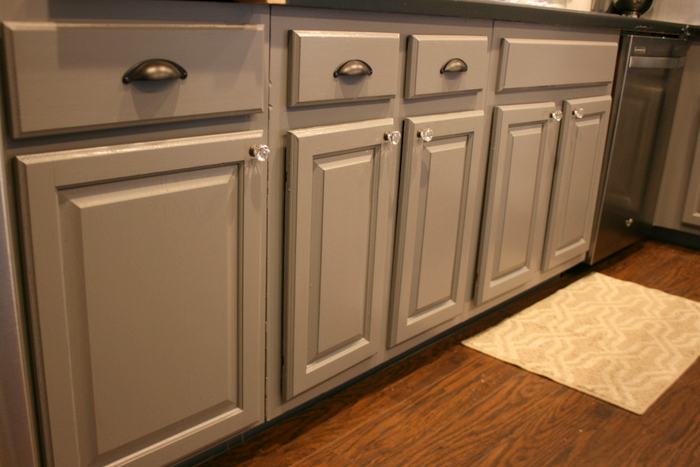
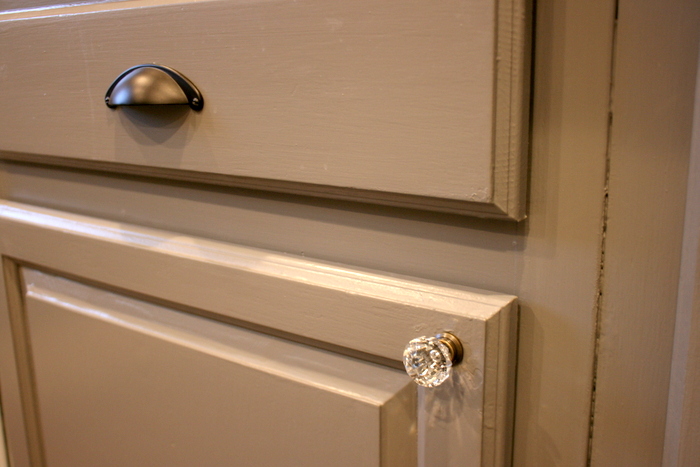
For the hardware, I chose Oil Rubbed Bronze Cup Pulls for the drawers and a little sparkle with some acrylic knobs for the doors all from D. Lawless Hardware. I love the combo – classic with a bit of glam.


Painting your existing kitchen cabinets is a great way to give you a new look on a budget. I’d say in total I probably used 3 quarts of paint and a pint of topcoat. It’s a lot of work to paint your cabinets but the results are worth it.
I love the new look! And did you notice the new floors… be still my heart. No more beige tile!
We’ve come along way. Next up… new counter tops. A new (up-cycled) island. And a new paint color for the walls (and ceiling). Thanks for coming along on the journey with me!
Jenni


How long did the total process take for the kitchen cabinets? Thanks!
I just finished another one, I’d say about 3 days!