The creative process is one that doesn’t always go as planned. That was the case with this cedar chest makeover. I thought at one point I had just about ruined it, but I kept going and changed the direction and I have to say, I love how it came out.
I wanted to share the thought process behind this makeover, because I know you have projects just like this one. You have something in mind and it just nearly frustrates you to no end before you get to the finish line. Or you email me, and say “I’m not very good at this…”, “I think this one is a fail…”, etc. So let this be an encouragement to you – 1. you are not alone, everyone who does anything faces frustrations from time to time. And 2. sometimes if you just push through, it may be different than you expected, but it may be even BETTER.
This post contains affiliate links. If you purchase from these links, it pays me a small commission. Thank you for your support. You can find my full disclosure policy here.
Supplies
Step 1. Paint your base coat
This chest came from my bedroom. I had refinished it years ago with Basil green milk paint, it went so well with our decor at the time, but since then I’ve changed the look. So In the Navy it was. I painted it 2 coats to completely cover the old color.
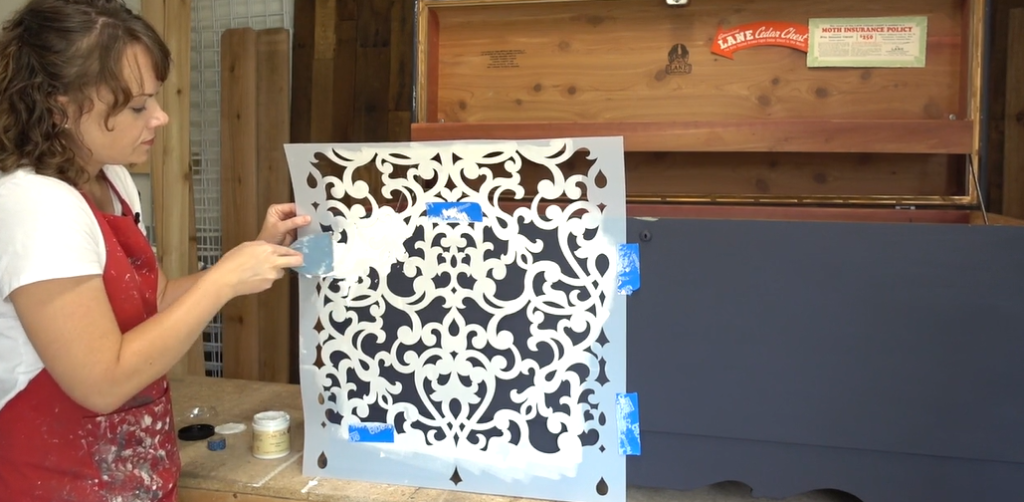
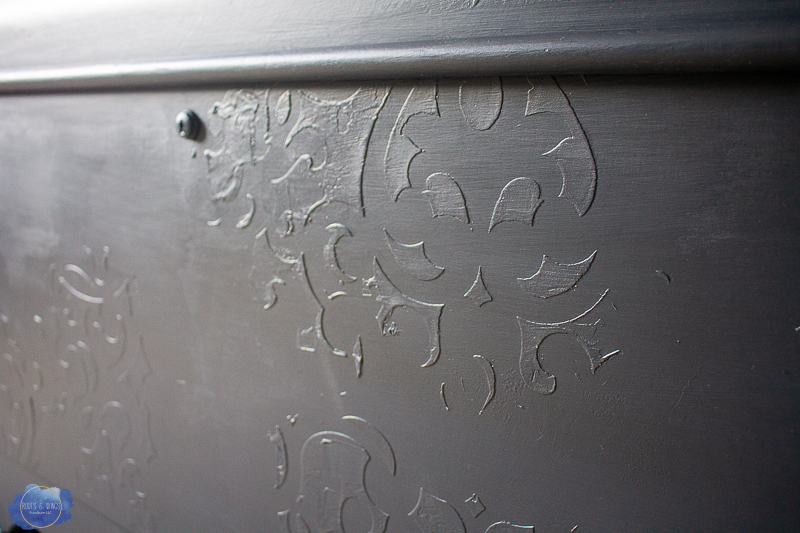
Step 2. Stencil & Mud
To get the raised stencil look, you need Dixie Belle Mud (it’s like spackle – and I think spackle would work here too). I applied it over the stencil with a plastic spatula and peeled the stencil off. Then let it dry. The thicker the application, the longer it will take to dry, so don’t make it too thick.
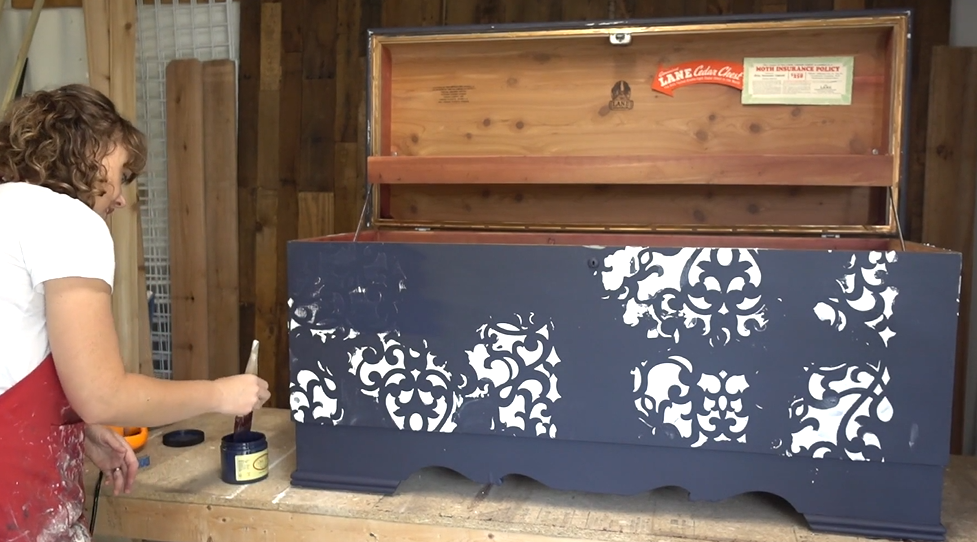
Step 3. Paint again
Okay now, once it’s all dry, paint it again. This was where I was loosing some confidence – like what had I just done?! I kept on though, and figure it would be okay. The creative process was seriously tested right about here.
Step 4. Distress?
I distressed it. I polled the audience on this one, and you all said “distress!!!” so I did. And then I hated it. It looked spotty, and more like a mistake than it was meant to be there. I painted right back over it.
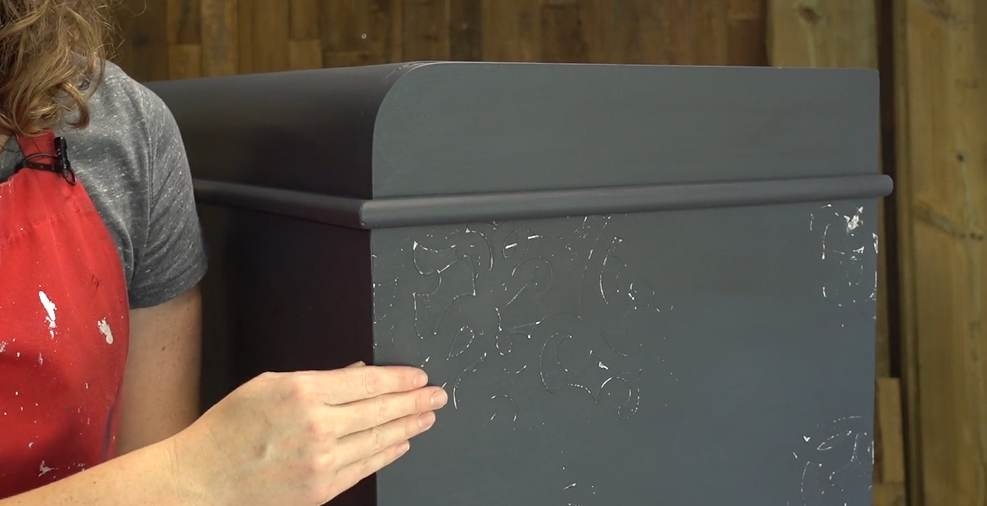
Step 5. Wax & Top Coat
To set off the raised details just a bit, I added some black wax with a chip brush. It really didn’t take much, but it just gave it a little interest. Remember, I don’t love wax, but when I use it I use Dixie Belle wax because it’s water based. So you can top coat right over it. Once the wax was dry, I used Satin Top Coat so it would even out the sheen and really seal and protect the raised stencil effect.
Here’s how it looks! And I have to say, I really do like it now!! I stuck with it, didn’t give up, and was pleased with how this creative process came out.
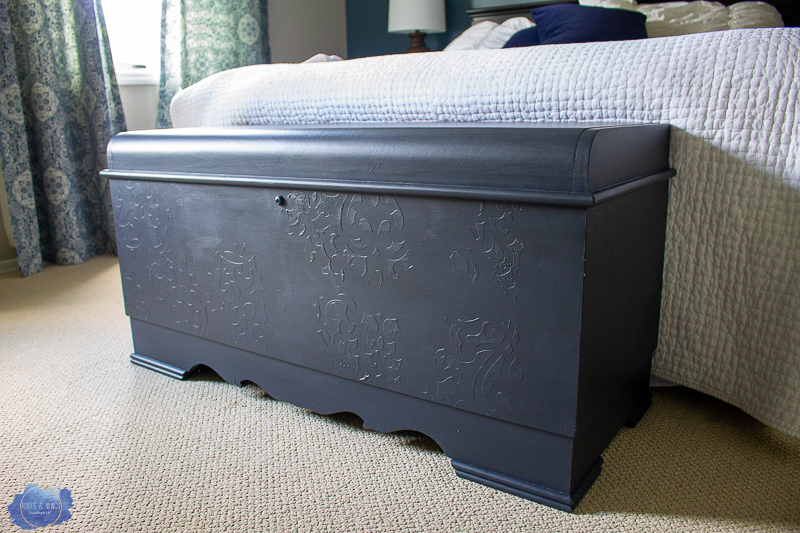
So, the next time the creative process doesn’t go as planned, persevere and keep on – you never know how it may turn out for the better!
What was the last project you wanted to quit?!
Jenni


I have a cedar chest just like this one that i’ve
been thinking of painting. Right now it has its original stain finish. What concerns me is the lid of the trunk rubbing the paint on the base of the trunk from being opened and closed. Did you find that to be a problem?
Btw, your videos are really helpful!
Christine
It wasn’t a problem on this one, but I have had that issue before. I just lift the lid and let the paint dry well before I close it. This should help. If the lid is very tight, maybe a bit of sanding would be the key.
That Looks Amazing!!
Thank you so much!