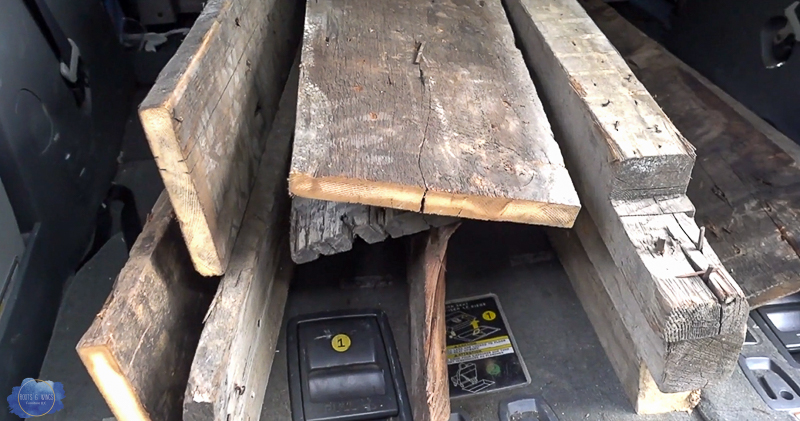
I was recently given some reclaimed wood – best gift ever, right?! We already love reclaimed wood on walls and as an accent on furniture, but I also wanted to do something simple. A bit of home decor that could be used for winter, something different that would bring tons of character to a space. You’ve all probably seen pallet wood trees, but how about a reclaimed wooden Christmas tree?!
7 Easy Steps to Make Wooden Christmas Trees
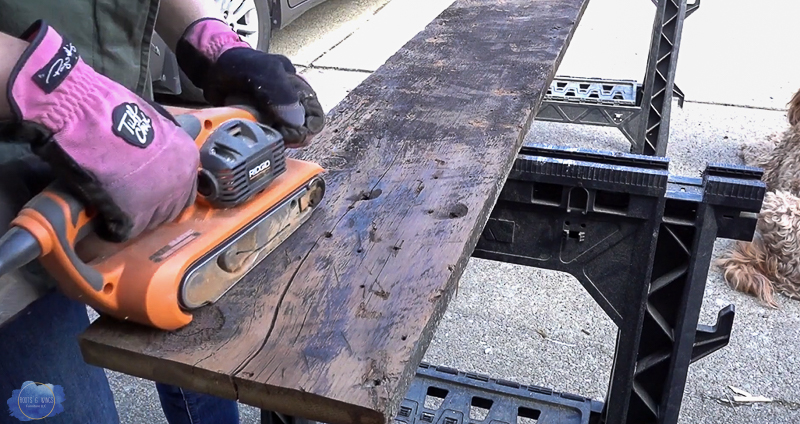
Step 1: Clean and Sand the Wood
I pulled out any remaining nails and tacks from this 1×10 piece. I was challenging myself to only use one piece of the reclaimed wood so I have plenty left to do some other projects. This piece was 8 ft long, and was just what I needed to build these wooden Christmas trees. (If you don’t have access to reclaimed wood, you could also do this with pine from the hardware store!)
I first sanded with my belt sander using a 50 grit belt. Immediately the dirt is sanded off to reveal beautiful wood underneath!
*Wear a mask and wear gloves, this process is messy*
Once I had the majority of the sanding done, I grabbed my pad sander and just did a quick pass with 120 grit sandpaper. This smoothed it out a bit more and took care of some rogue splinters.
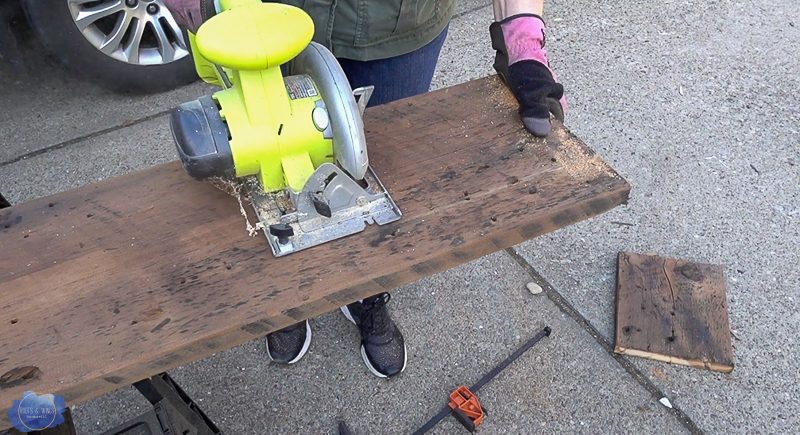
Step 2: Cut into Pieces
I wanted my tree bases to be about 12″ wide and my trees to be about 3 ft tall. So I cut a few piece at 12″ wide and began to lay out the tree design.
Once I had my base pieces cut, I began to rip the wood into thinner planks to give the tree some varying plank widths and make them a little more interesting to look at.
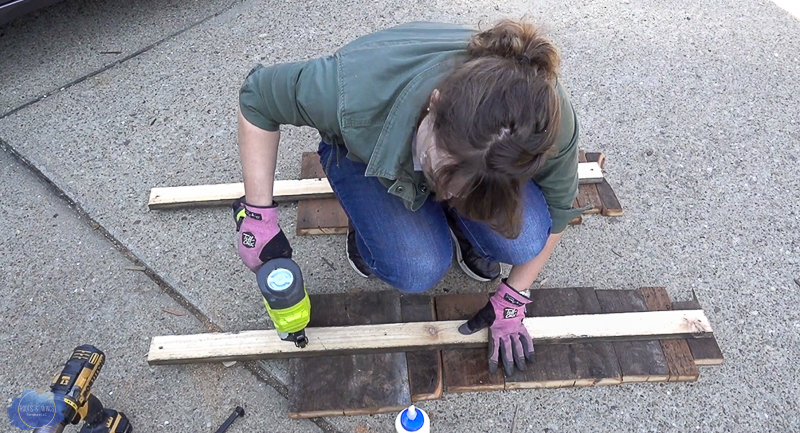
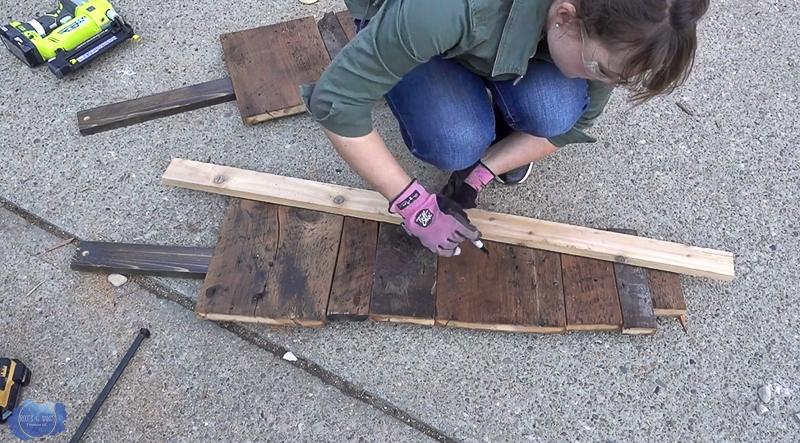
Step 3: Layout Wood
I laid out all the pieces on my driveway, and alternated the pieces in width as I made the rough forms of the trees. I also used some of the un-sanded sides to give a variation in color. Just flip, position and adjust until you feel like your tree looks right.
Step 4: Build your Tree
Using some pieces of scrap wood as a brace, I glued and nailed the pieces together. You could also use screws here but I didn’t have the right length.
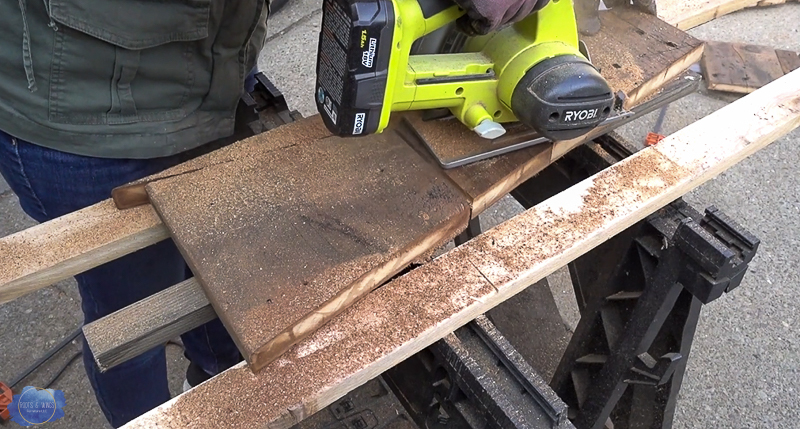
Step 5: Mark your Triangle
Flip your tree over and using a straight piece of wood mark your triangle. I wanted my wooden Christmas trees to be tall and skinny triangles, so that’s how I designed these. They could be any size or shape you’d like though. I marked my lines with a marker.
Step 6: Cut
Using my circular saw I cut my triangles, this gave the edges a nice clean cut. I did have to use my chop saw to clean up a few cuts, but this worked well. Reattach and glue some of the top pieces if they need a bit more re-enforcement.
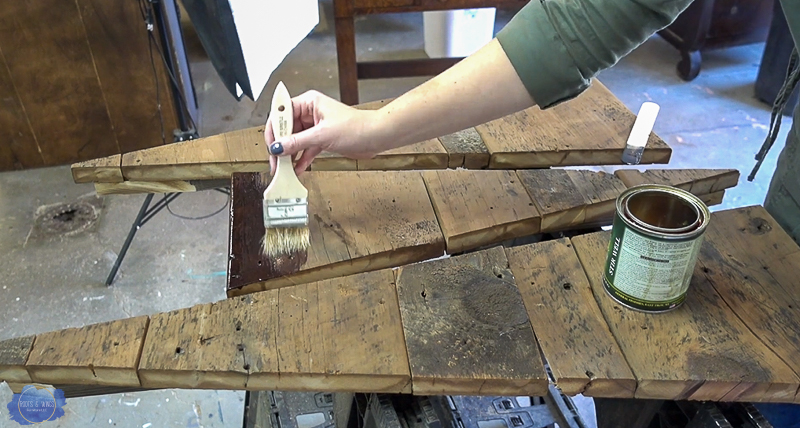
Step 7: Seal
This step is completely optional, but because this wood was old and dry, I grabbed some oil based polyurethane to seal up the wood and re-hydrate it. This really darkened the color of the trees, so make sure you are okay with the darker appearance before you do this.
In 7 easy steps we’ve taken some beautiful old reclaimed wood and turned it into a set of wooden Christmas trees, perfect for winter decor on your mantle, front porch, or anywhere you need a little rustic charm!

I hope you enjoyed this simple wood project – more fun with this reclaimed wood coming your way soon!
Jenni

