This is the last week of the Summer Tutorial Series. Thanks for sticking with me this far, if you missed any, here is what we’ve covered:
Week 1: Java Gel Stain Tutorial
Week 2: Painting Laminate Furniture
Week 3: Color Washing Tutorial
Week 5: Pearl Effects Metallic Tutorial
Week 7: How to Re-Upholster a Chair
Week 8: Color Washing Over Wood
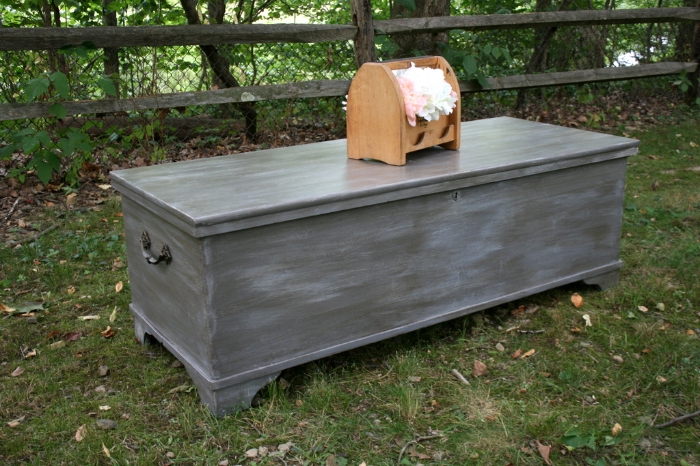
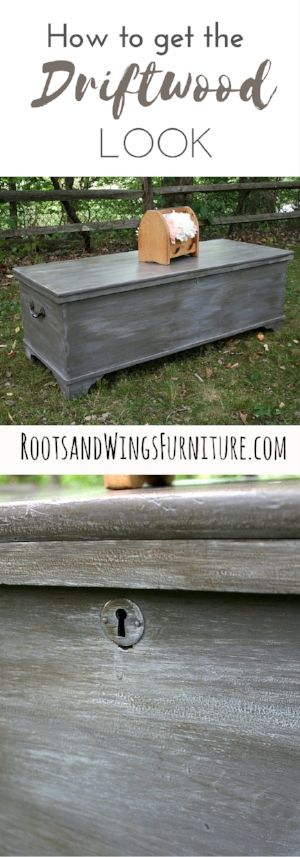
On to business… today’s tutorial is how to get the Driftwood Look (also called the Restoration Hardware Finish). I’ve tried a few different methods to get this look, and the way I’m sharing today is the most consistent and fool-proof.
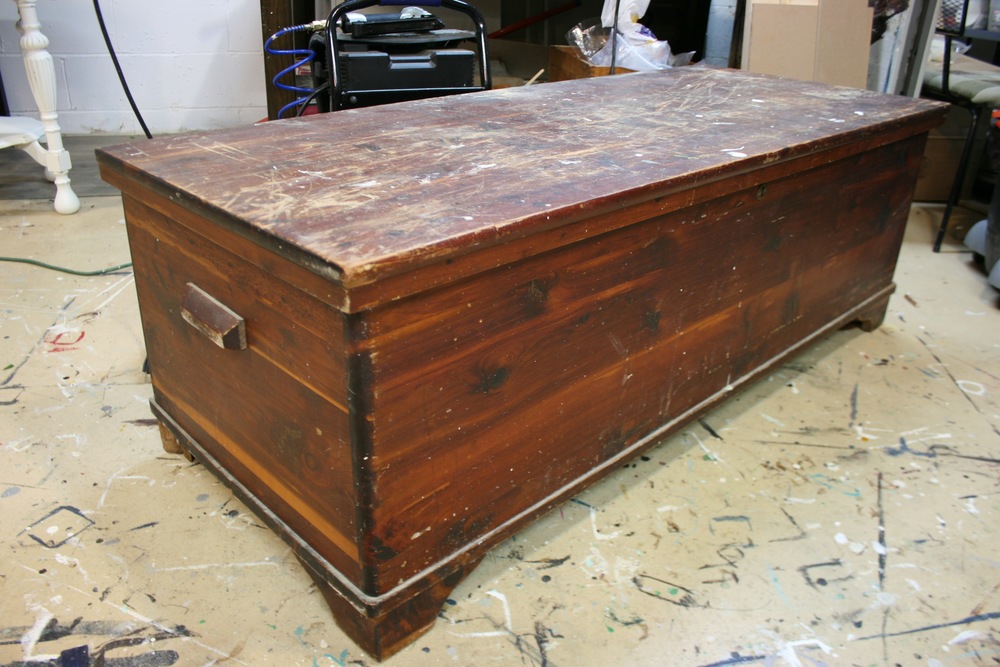
Here’s the before and after of this cedar trunk.
Materials you need to get the Driftwood Look:
Some of the links are affiliate links to help you find what you need! These are products I have tested and used myself or something comparable.
● 220 Sandpaper
● Driftwood Milk Paint
● Winter White Glaze Effects
● Van Dyke Brown Glaze Effects
● Purdy XL Cub Paint Brush
● Dry Paper Towels
● General Finishes High Performance Poly
To start, you apply 2 coats of Driftwood Milk Paint, then it’s two coats of glaze applied in a dry brushing technique. (I also think a watered down milk paint could get you the same look. If you have Snow White and Dark Chocolate, you can try that.)
Paint can be substituted for glaze, but not the other way around 🙂
This technique is a great way to add character to a plain piece or over a detailed piece to make the details really pop. Also, the glaze settles into and brings out dings and scratches for really nice character.
Here’s the tutorial video
I’d love to see your projects if you try this technique.
As always, if you love this, please pin to share.
Happy Painting!
Jenni

