One of my friends is remodeling her house – it was a “love it or list it” situation so they are going room by room painting walls, changing floors, baseboards, doors, the whole thing. She texted me a picture of this dresser in the midst of all this, and said can you do something with this?? What was once her daughters dresser, is now going to be the guest room dresser. It needed a second lease on life – something a little updated. My first thought was a gray dresser (they are using a lot of gray tones in their remodel) but then I thought how about a two-tone gray dresser! Oooh yes, this treatment is sure to update any piece!
Here’s what we’re working with – this dresser is in approximately half of all bedrooms in the United States – it’s a common style, with the most common (awful) handles – not pictured – and the most blah reddish brown stain. Let’s do something about it…
This post contains affiliate links to the products I use and recommend. Using any of these affiliate links will cost you no extra, but pay me a small commission. To see my full disclosure policy, click here.

Supplies for a Two Tone Dresser Makeover
- 220 grit sand paper
- denatured alcohol
- Perfect Gray Milk Paint
- Purdy XL Cub
- Pad Sander
- 120 grit sandpaper
- Antique Oak Water Based Wood Stain
- Walnut Water Based Wood Stain
- High Performance Topcoat Flat
- Hardware
Here’s the video on the process:
Step 1. Remove all the hardware – and you probably should just THROW IT AWAY!
Step 2. Remove the drawers and set them aside. I sanded the drawers down first with my pad sander and 120 grit sandpaper.
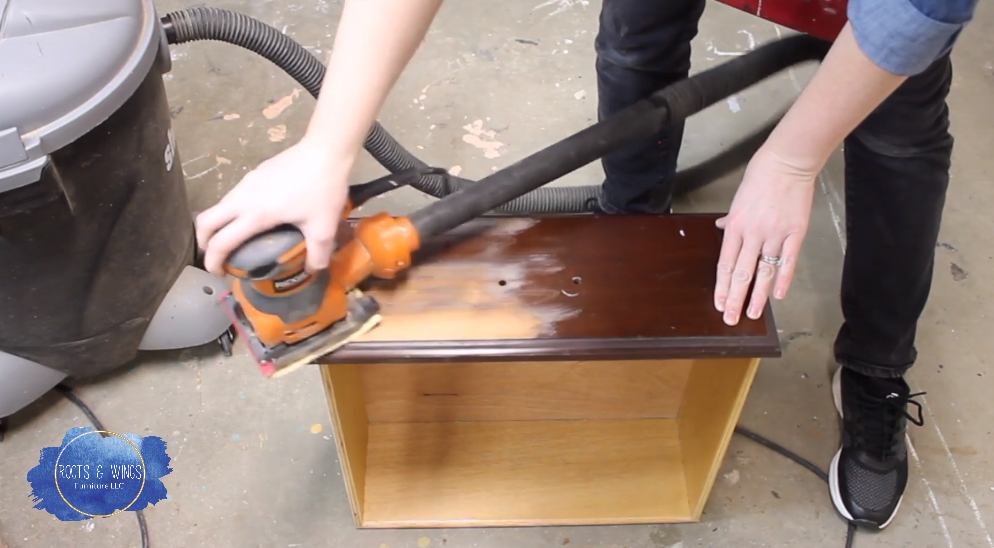
Step 3. Scuff sand the rest of the dresser with 220 grit sandpaper and clean with a mix of denatured alcohol and water (or White Lightning).
Step 4. Paint the case of the dresser – I’m using the NEW Perfect Gray – and let me tell you, it is darn near perfect! It’s a beautiful warm shade of gray that will go beautifully in the new room. Perfect Gray is indeed the perfect shade of gray for a gray dresser!
Step 4. While the dresser is drying, stain the drawers. I used my favorite 50/50 mix of Antique Oak and Walnut Water Based Wood Stain. I just used a rag to apply it, wiped it off quickly and let it dry.
Step 5. Back to the dresser, give it a second coat of paint and let it dry.
Step 6. Topcoat the drawers once the stain is dry. I used General Finishes High Performance Topcoat in flat finish. I let it dry, then came back to smooth out any rough spots with 400 grit sandpaper before giving it a second coat of topcoat.
Step 7. Install your new hardware. Admire your hard work!
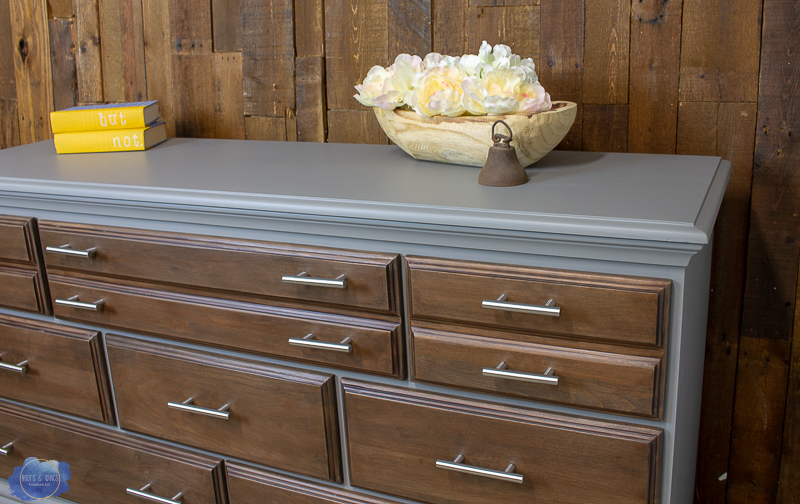
A gray dresser with wood tone accents is just so good! I did a similar one a few years ago – you can check out that combo here.
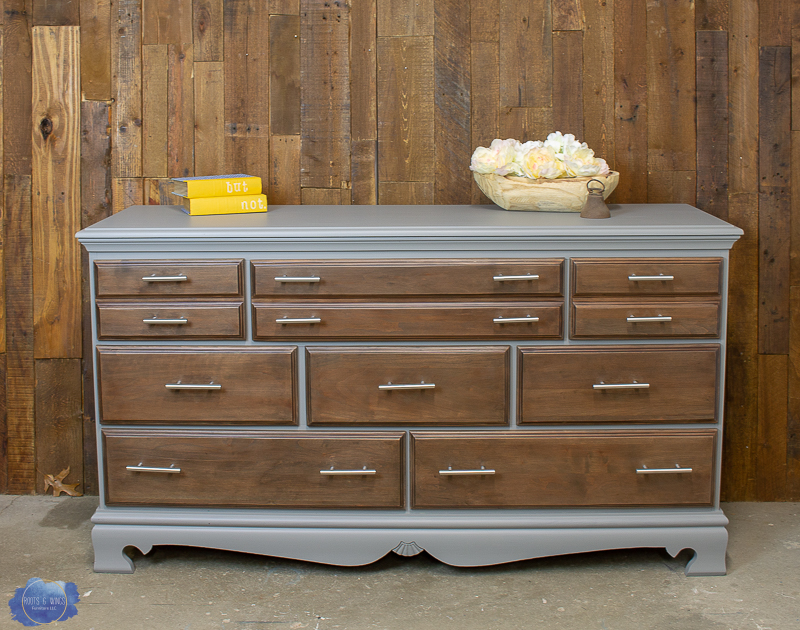
Give Perfect Gray a try, you’ll love it! This gray dresser is finished – I love the two tone look, do you??
Stay creative my friends!
Jenni

